Vipps Mobilepay integration #
-
Skrevet af Caspar Ejsing
Application Builder #
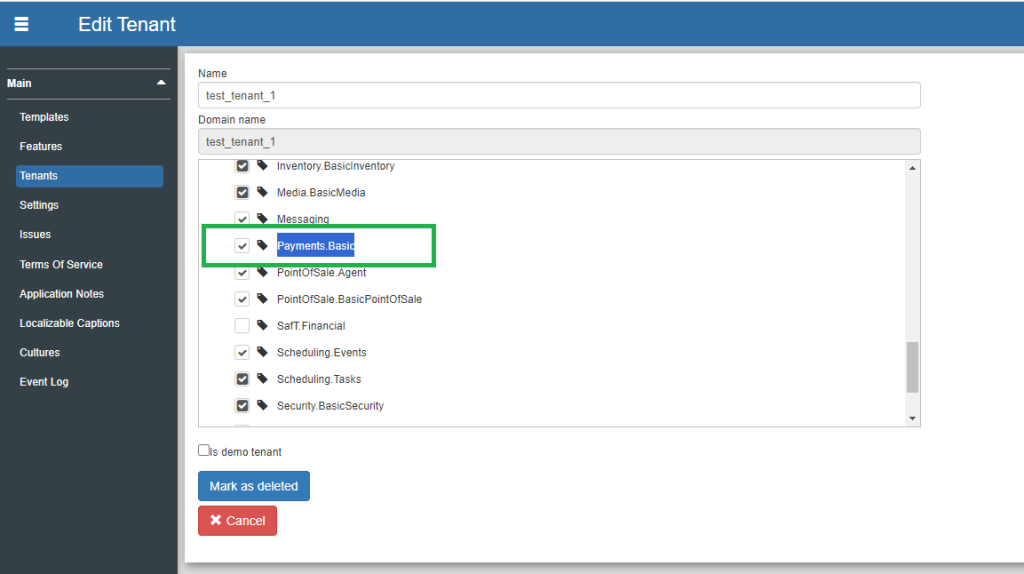
Make sure [Payments .basic] is enabled for the tenant (this is part of the new “Payment microservice”, which is responsible for handling payments, including Vipps payments).
Financial app #
Open [Financial] app.
Create Vipps incoming payment option #
Access the [Incoming Payment Options] page ({base address}/financial/app/#/incoming-payment-options) and create a new incoming payment method with [Payment type] = Vipps E-payment and [Quick access available] enabled.
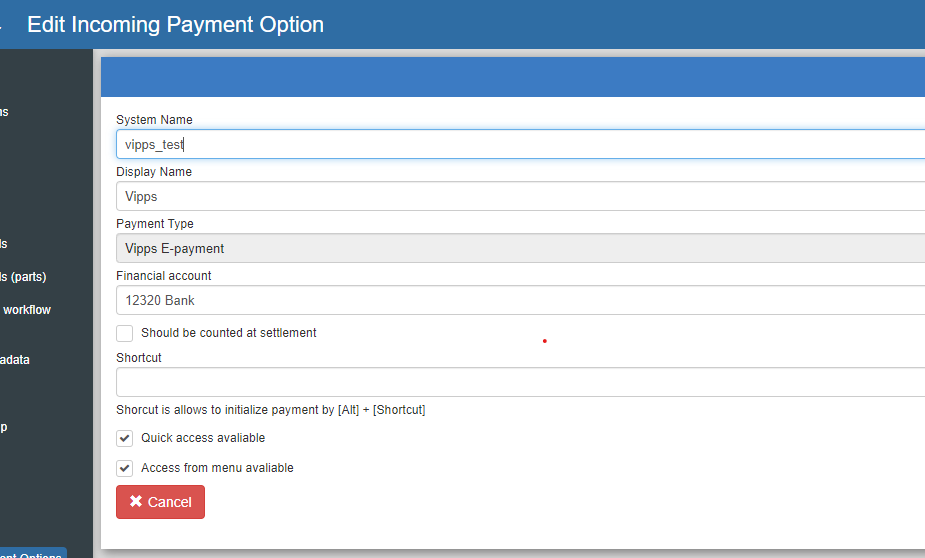
Make sure the payment method is checked.

POS app #
Open [POS] app.
Create Vipps agreement #
Go to the [Vipps Agreements] page ({base address}/pos/app/#/vipps-agreements) and press the [+] button. Enter the display name of the new Vipps agreement in the editor and press the [Set API Keys] button. Then enter the API keys (client_id, client_secret and Ocp-Apim-Subscription-Key).
Then go to [Gem].
Note: API keys are stored in the db in an encrypted way, so they will not be available for the next edit, and if the user wants to change them – they must be entered again.
Setup Vipps agreement webhook #
On the [Vipps agreements] page with the selected Vipps agreement, click the [Register webhook] button.

Create Vipps sales unit #
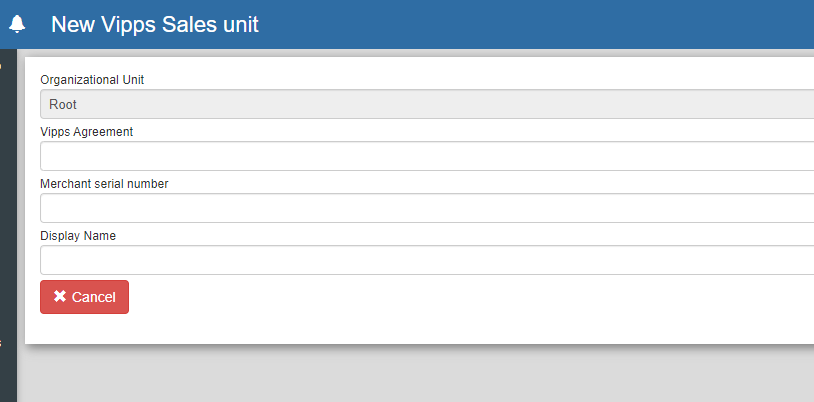
Go to the [Vipps Sales Units] page ({base address}/pos/app/#/vipps-sales-units) and press the [+] button. Select the current organizational unit in the opened dialog.

Then the editing window opens to define the Vipps sales unit display name and selected Vipps agreement (e.g. created in previous step).
You must also enter the Merchant Serial Number on the Vipps sales unit.
Setting up merchant QR codes #
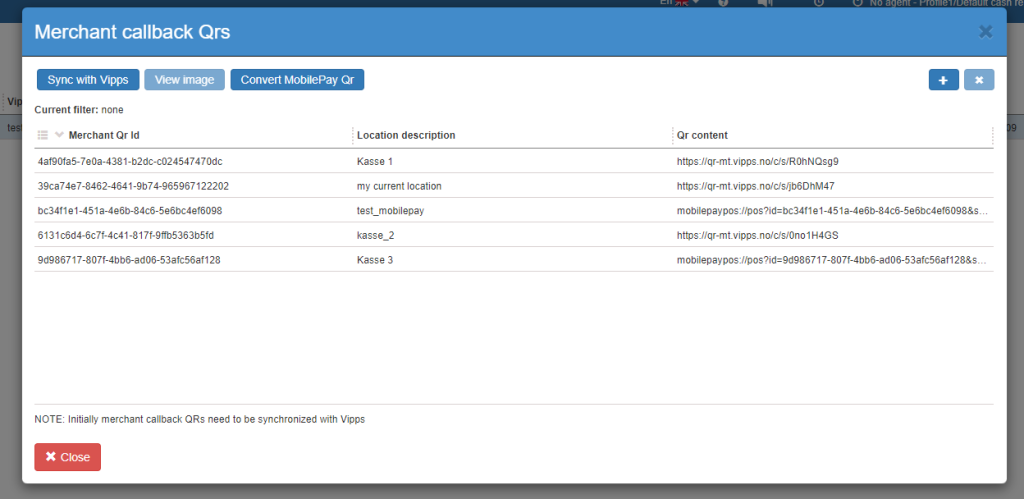
On the [Vipps sales units] page with the selected Vipps sales unit, click on the [Merchant callback Qrs] button.

Then press the [Sync with Vipps] button in the popup window to retrieve previously created webhooks from Vipps. Also in this popup it is possible to create a new Merchant callback QR or convert existing MobilePay QR to Merchant callback QR. It is also possible to view the QR image.
Setting up an agent profile #
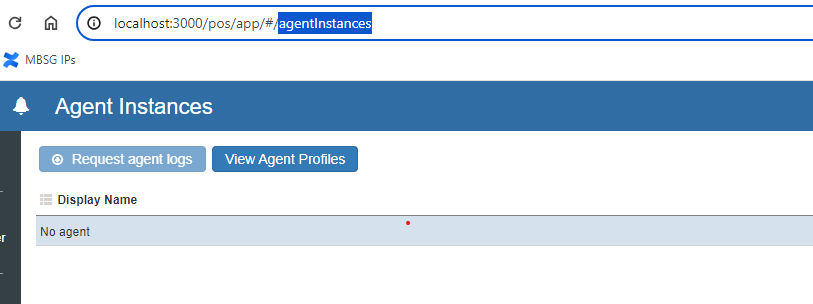
Go to the [Agent Instances] page ({base address}/pos/app/#/agentInstances) and select one of the agent instances in the grid (e.g. NoAgent). Then press the button [View agent profiles].
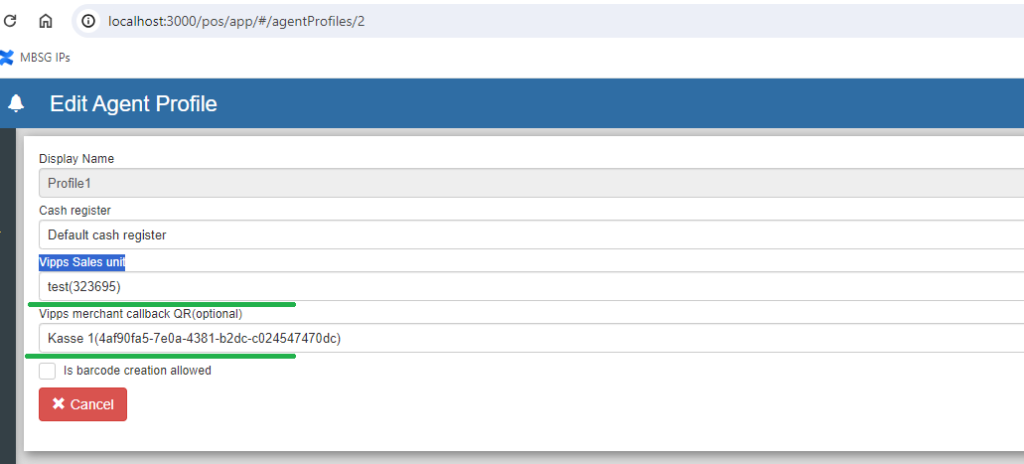
Select one of the agent profiles and press the button [Rediger]. In the open window, select the Vipp sales device and one of its Merchant callback QRs.
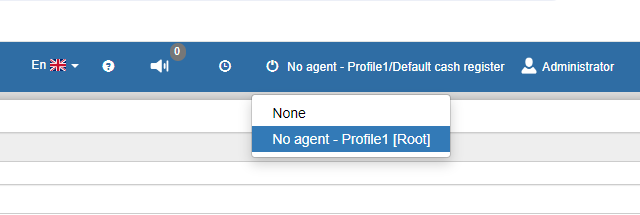
Save changes and select changed agent profile for the current session.
Payment flow #
Payment flow will be demonstrated when creating sales.
Go to the [Nyt salg] page ({base address}/pos/app/#/new-sale) and press the [Start nyt salg] button.
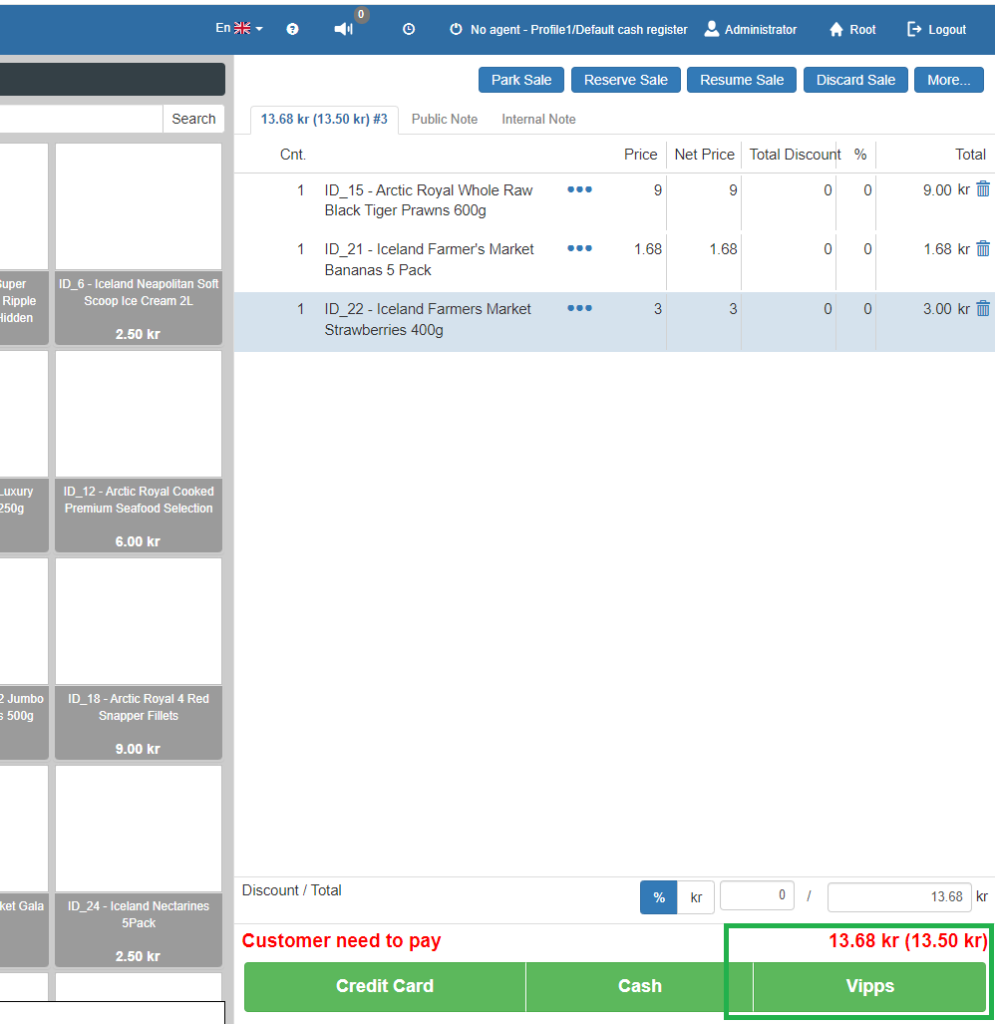
Add some products to the basket.
Then press the [Vipps] button (payment option created during setup).
The payment screen opens. Uncheck the [E-mail faktura] checkbox (for your convenience) and press [Betal]
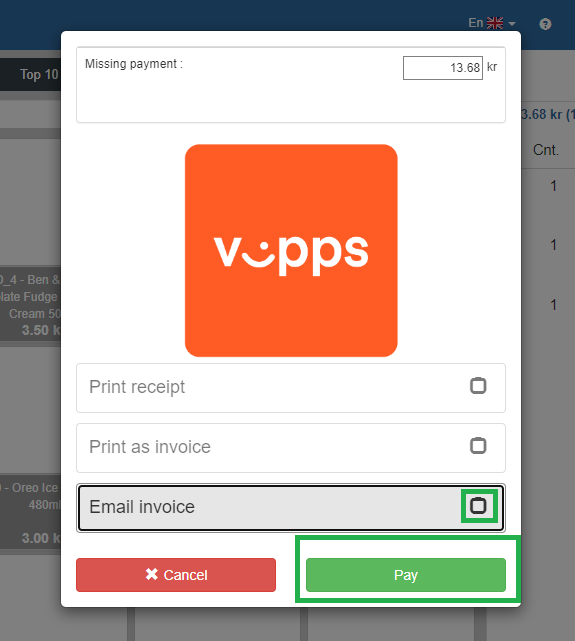
Customer identification dialog will be opened.
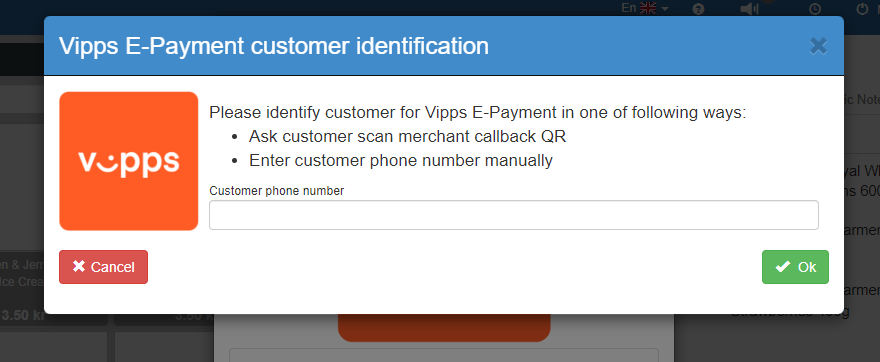
There are 2 options: enter customer phone manually or scan the merchant callback QR previously assigned to the agent profile, then the window will automatically close and payment will begin.
Then there are 2 options:
A – Unhappy flow. Before the user will authorize payment on their phone, tap the [Afbryd] button.
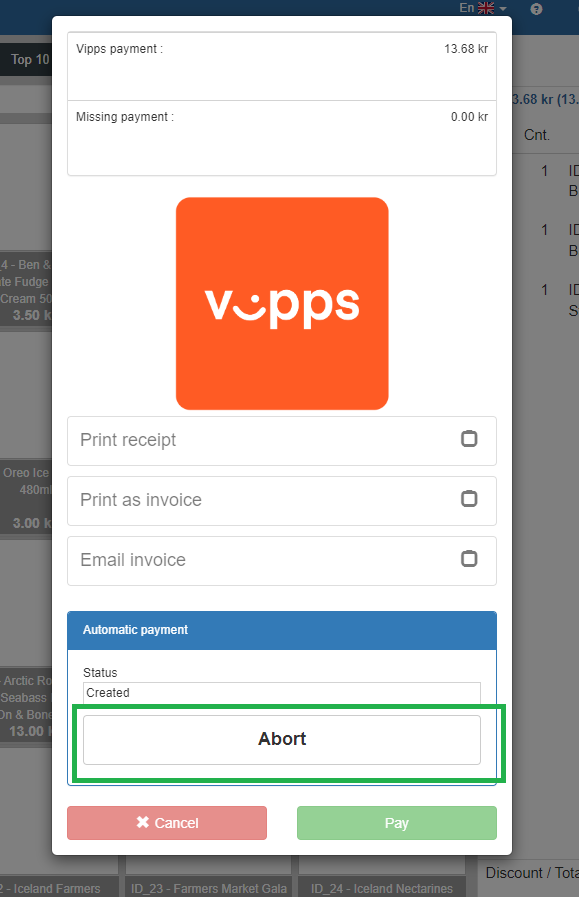
Then the payment will be interrupted.
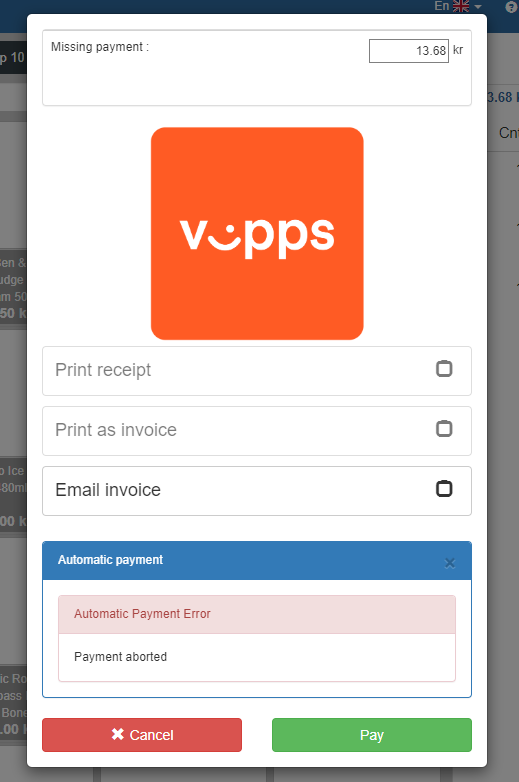
B – Good flow. The customer gets push notification of payers on their phone with information: “[Lejernavn]: payment for sale [Salg-id]”. Approve payment in customer phone. Payment will be captured and completed, and if the payment amount will be enough to complete the sale – the sale will be completed automatically.
View payment event log flow #
Go to the [Salg] page ({base address}/pos/app/#/processed-sales) and press the [Se] button on the last selected sale. [Se udsalg] page will open.

Find the [Financial] section on the [Se salg] page and click on the [log] icon for Vipps payment
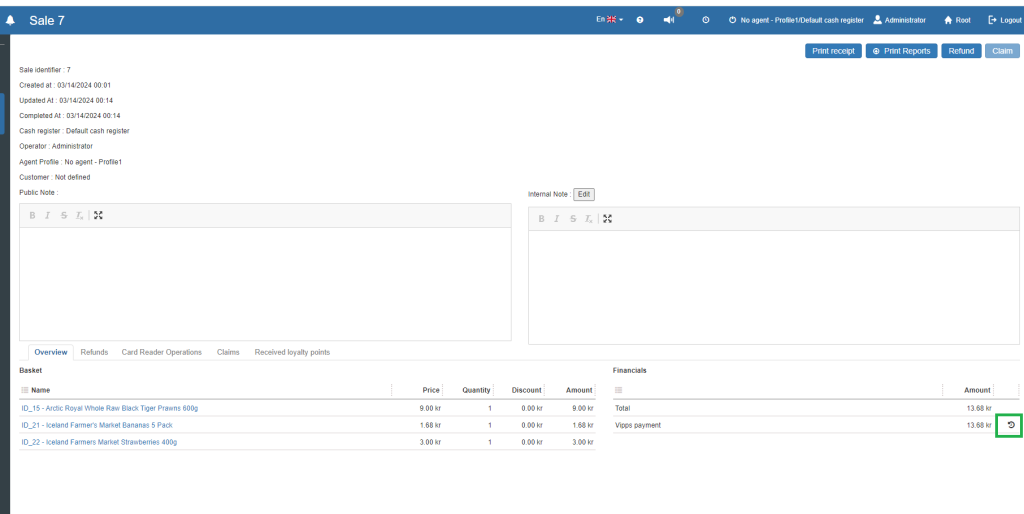
The Vipps E-Payment event log will be displayed
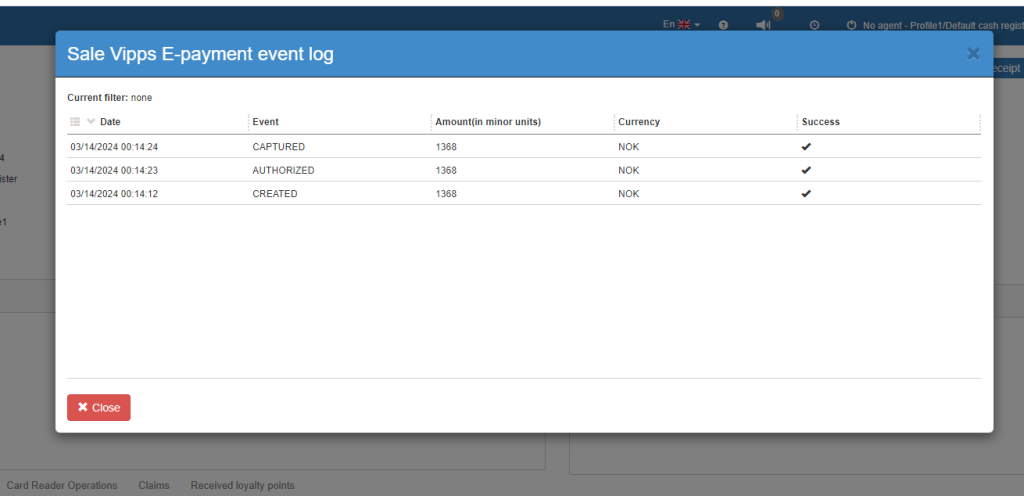
Refund payment flow #
On the [Se udsalg] page, click on the [Refusion] button.

Tap [Vælg alle] in the opened popup and then [Refund]

Returns will be added to the basket.
In the [mere] menu, tap on the [Refund original salgsbetaling] item.
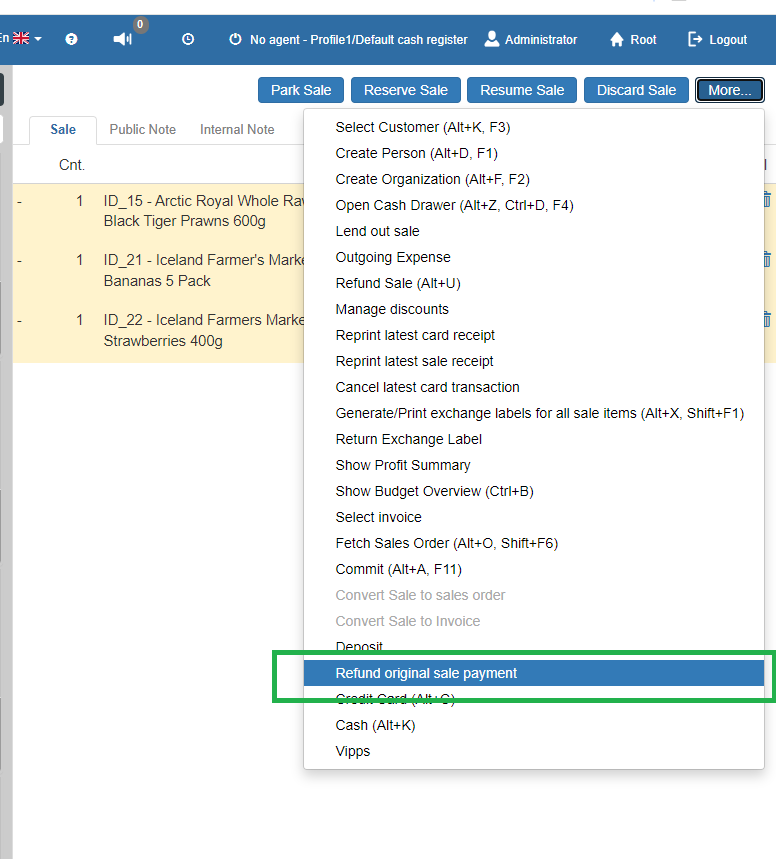
On the selected popup, select the payment to refund and amount to refund, and then tap [Ok].

Refund payment will be registered.

It is possible to tap on the [log] icon to view the refund detection event log.
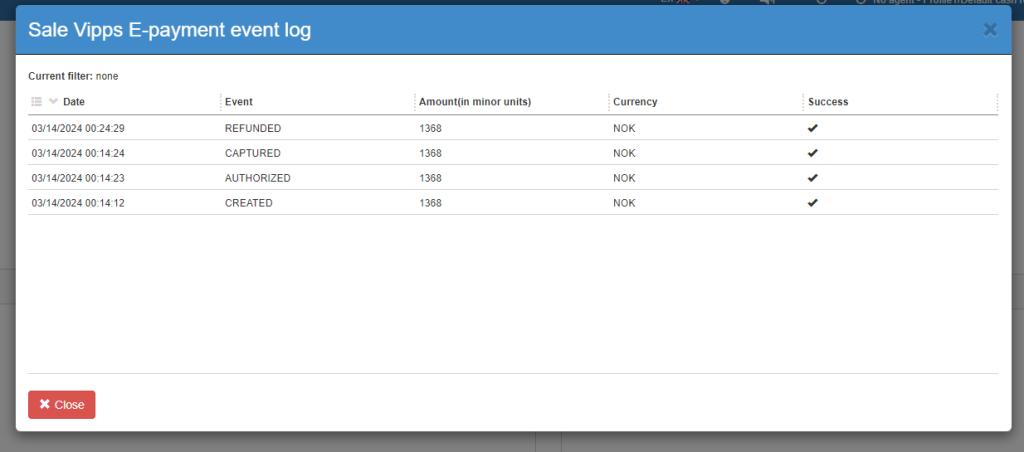
How to test Vipp's webhook locally #
For debug purposes, you may need to test the Vipp webhook locally. For that, we need to somehow expose the HTTP url to the web and register the webhook using it.
The following changes need to be made in Payments microservice app.config:
added the following key to the KeyValueSettings section: <add key=”VippsTestWebhookUrl” value=”<https://crs-vipps-webhook-test.loca.lt>” /> (value https://crs-vipps-webhook-test .loca.lt used as example);
Make sure that the setting of VippsEPaymentIsTestMode is set to “true”, otherwise the setting of VippsTestWebhookUrl will be ignored.
Must be installed globally on workstation after npm package npm:localtunnel
After starting services, launch the following command in command prompt:
lt — subdomain crs-vipps-webhook-test –port 9000
The answer will be: your url is: https://crs-vipps-webhook-test.loca.lt and then 9000 port will be accessible from the internet via url https://crs-vipps-webhook-test.loca.lt which will be enough for setting up and testing the VIPPS webhook.
NOTE: The lifetime of the local tunnel is not defined, but in my experience it is turned off every time when the debug services are stopped, so every time after restarting services the local tunnel command must be run again. d
Video demonstration
Want to share the article?


