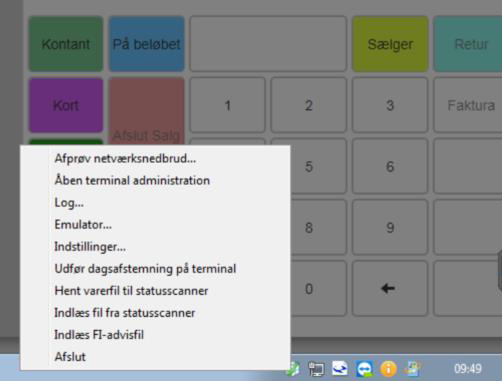
To change the printer setup in Sapera, start by right-clicking the icon for the CRS Agent.
Then click "Settings"
Under the "Printer" tab, select the printer you want Sapera to use.
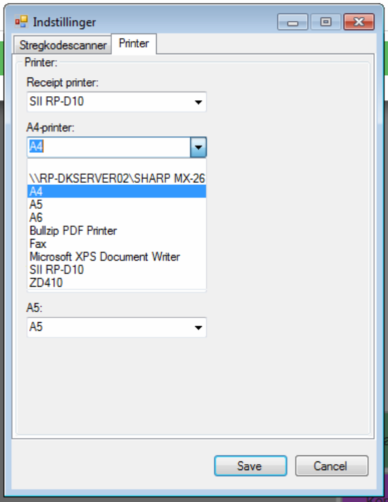
Click "Save"
Changes to the printer selection now take effect immediately and no longer require the CRS Agent to be restarted. In addition, if a print fails, a clear notification is shown so the error is not missed.
Start by closing the CRS Agent - (right-click the agent icon) and click "Quit"
Search for "CRS Agent" on your computer.
Click "CRS Agent" to install.
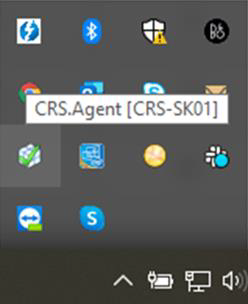
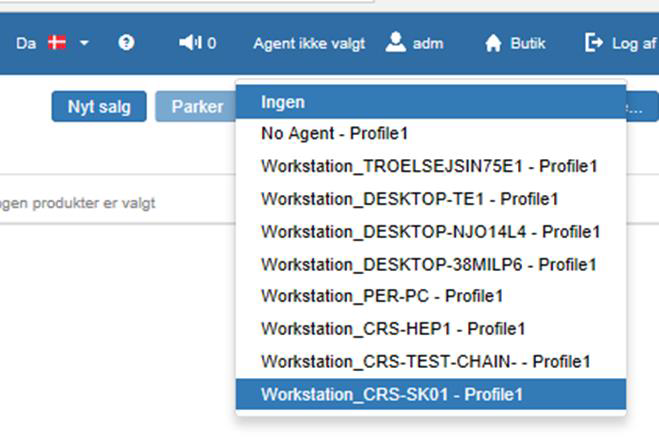
To use Sapera, a CRS Agent must be installed. In this example, the CRS Agent is named "CRS-SK01". The agent has the same name as your PC.
The user at the POS must be linked to the CRS Agent, so it is important to select the profile in Sapera that has the same name as the CRS Agent. In this example "Workstation_CRS-SK01 – Profile1"
Want to know more?
Read more in these related articles:
CRS Agent - Download agent
This article explains how to download and install the CRS Agent via Sapera – from download to activating the agent profile.
CRS Agent - Select agent
This article explains how to install the CRS Agent and select the correct user profile in Sapera
CRS Agent – Restart agent
This article explains how to restart and reinstall the CRS Agent if the connection to Sapera is lost
