We can find this function under “Purchasing” → “Digital inbox”.
Here all incoming e-mails with attached invoices are shown.
In this example we can see that we have received an invoice that has not been processed.
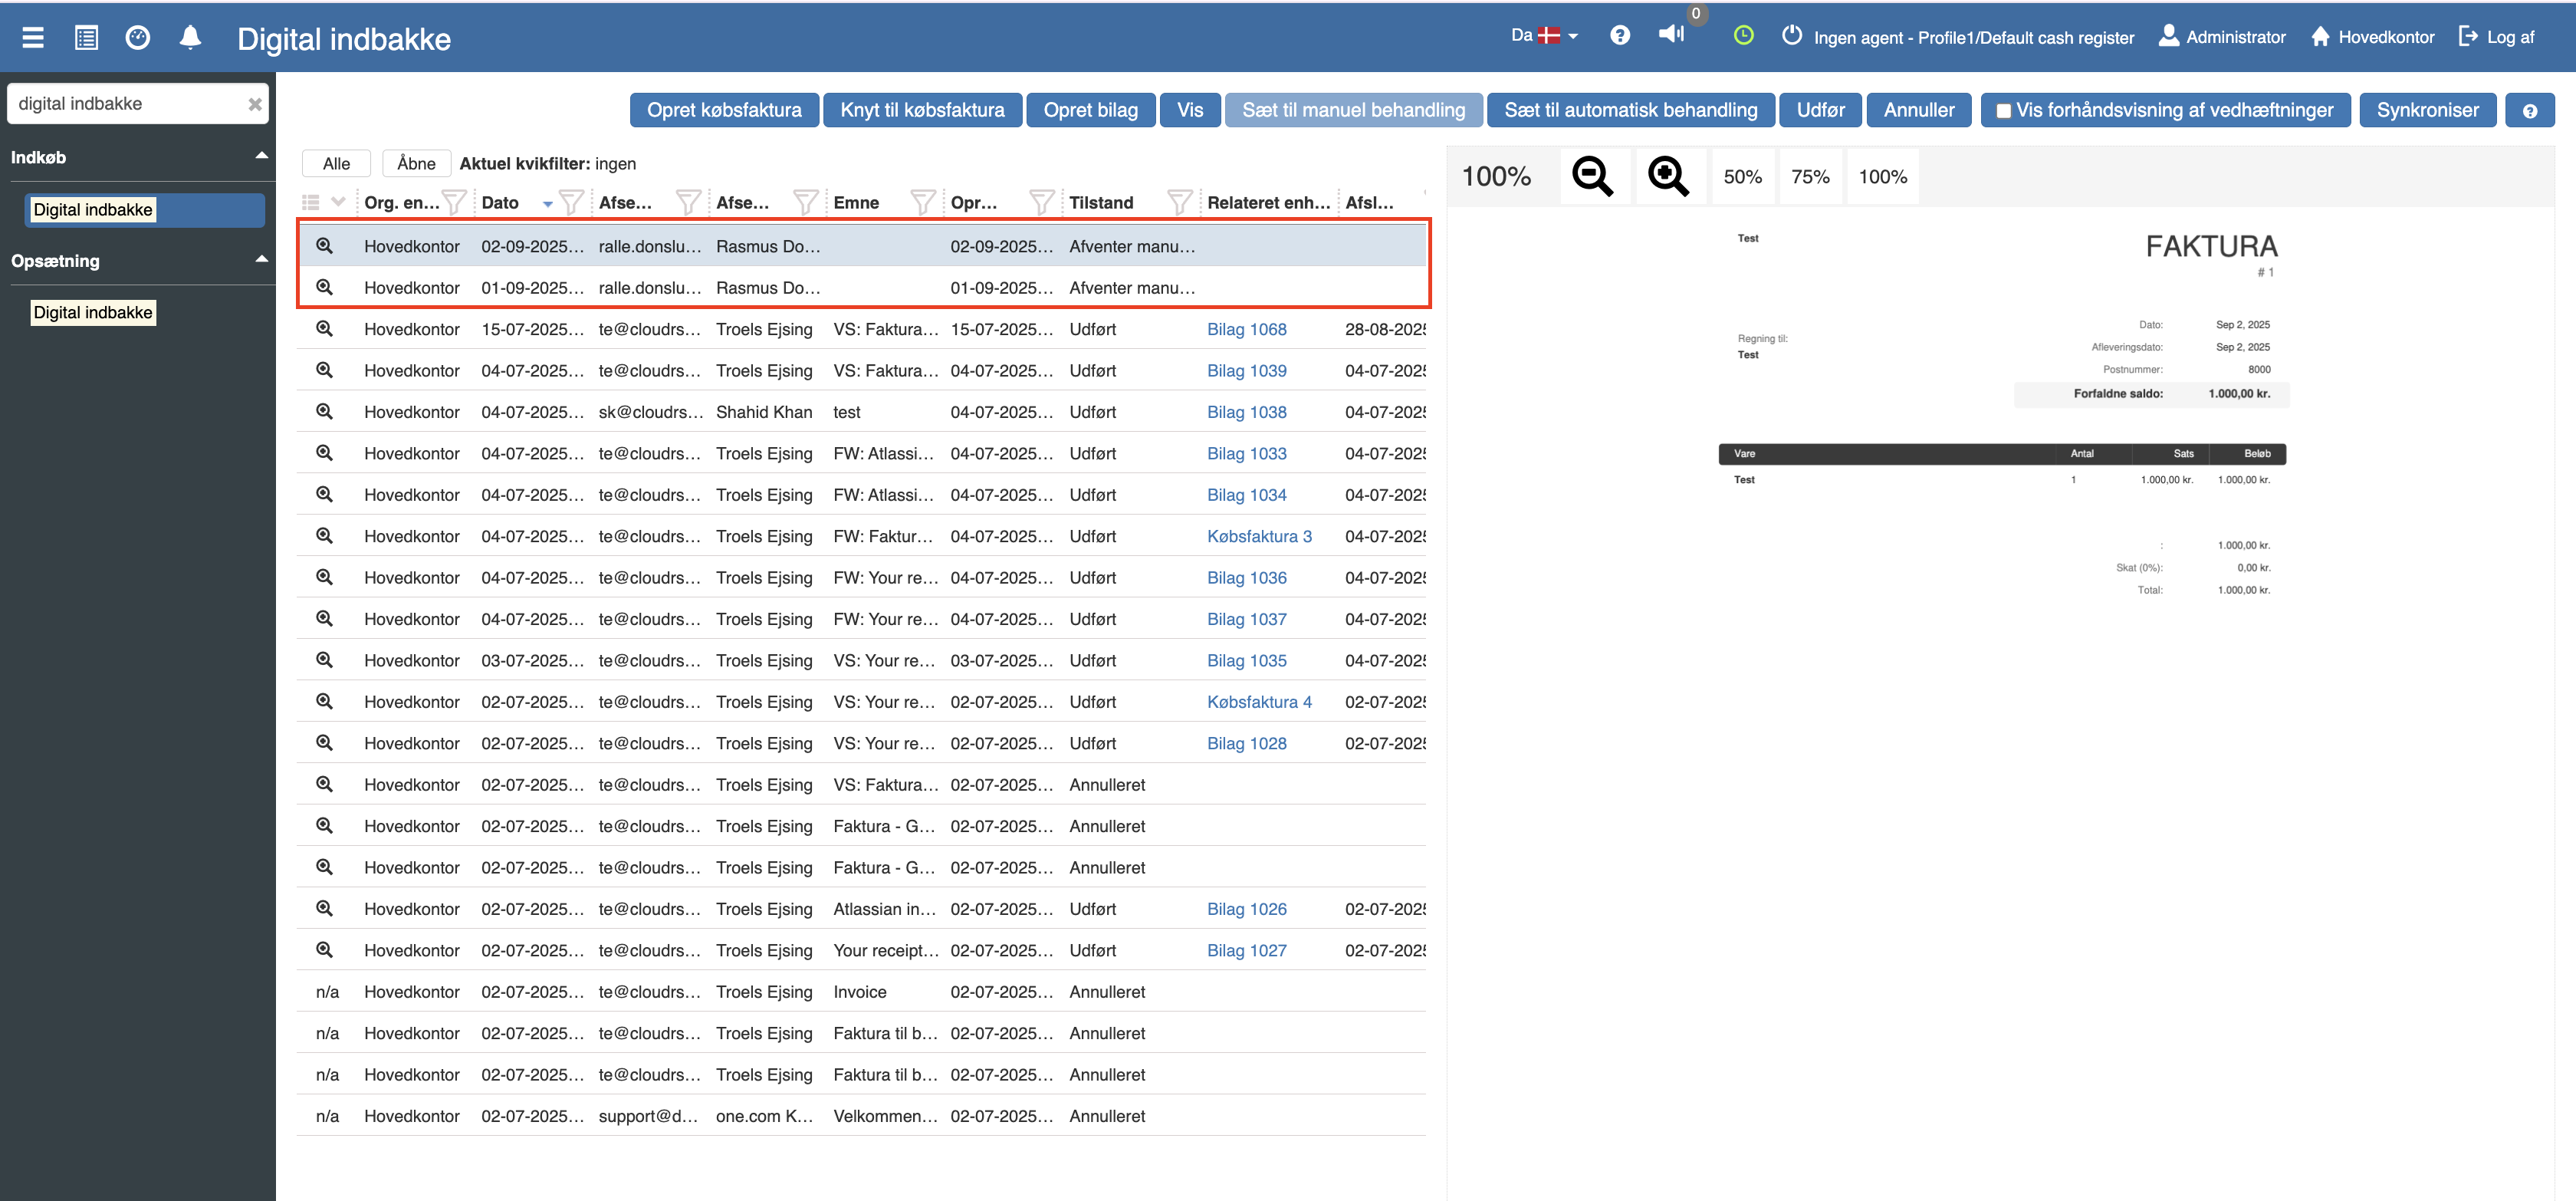
From the inbox you can choose the following actions:
Create purchase invoice – creates a new purchase invoice directly from the invoice.
Link to purchase invoice – links the invoice to an existing purchase invoice.
Create document – opens a posting journal where the document can be registered manually.
View – shows details about the selected document.
Set to manual processing – changes the status so the document must be processed manually.
Set to automatic processing – marks the document for automatic processing, if rules have been set up for it.
Complete – marks the document as fully processed/completed. A confirmation window opens, where you can write an optional message (e.g. “checked and posted”), before you confirm.
Cancel – marks the document as cancelled, e.g. if it is a duplicate or an error. Here you can also write a short message (e.g. “duplicate – to be deleted”) before you confirm.
Show preview of attachments – gives a quick preview of the attached document directly in the inbox.
Synchronize – fetches new documents into the inbox (e.g. e-mails/invoices received since last time).
When you select Create purchase invoice, a window opens where you can choose whether the invoice should be created from a purchase order, a receipt or as a new invoice.
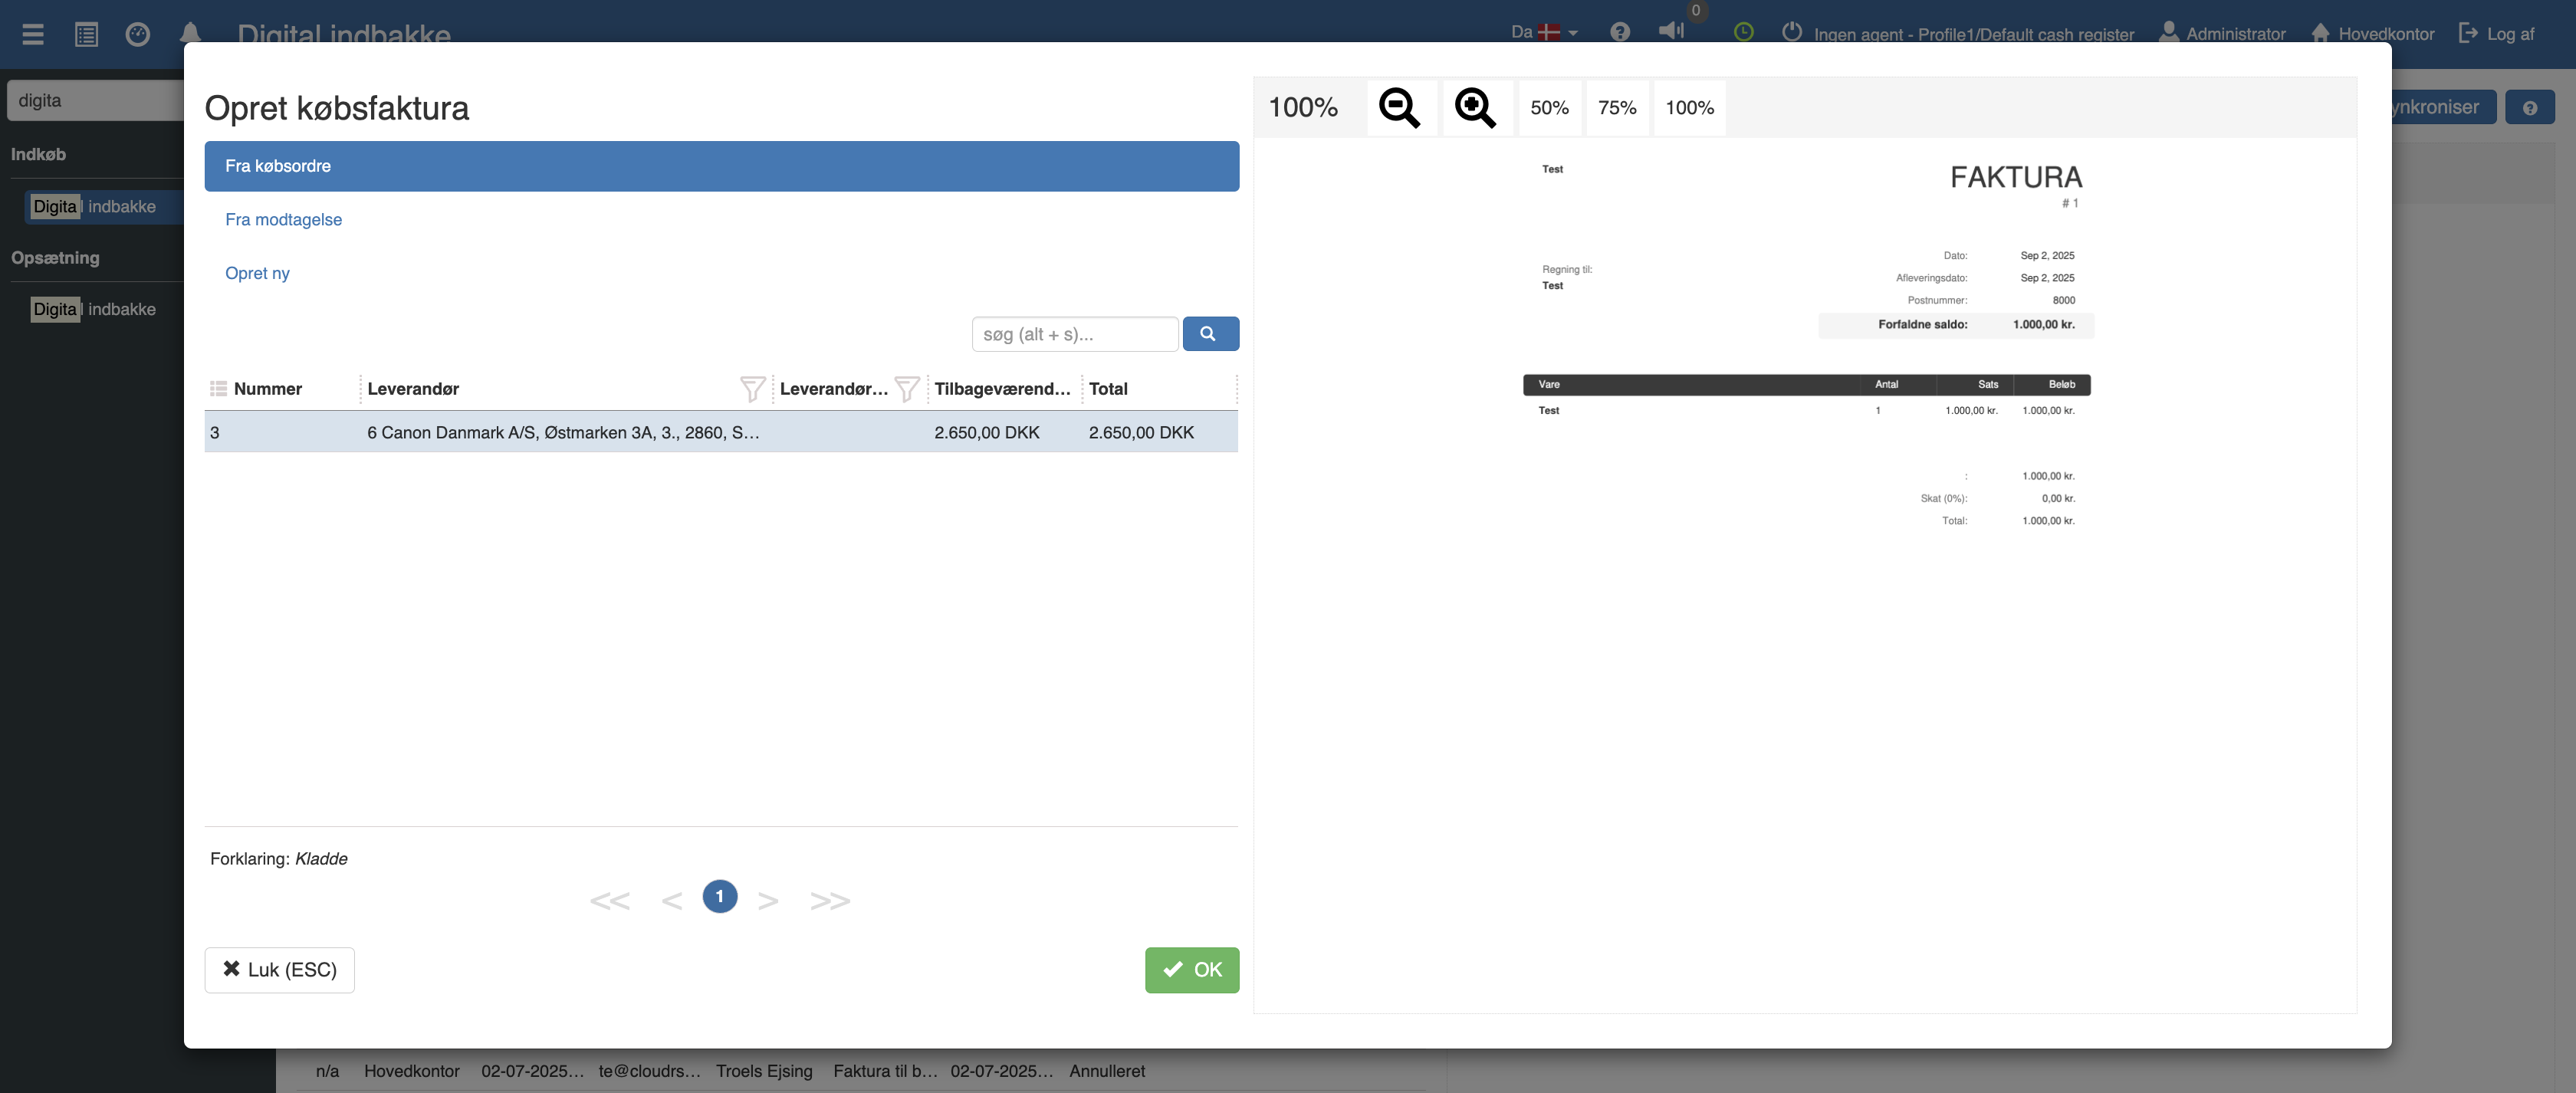
On the left the 3 options are shown and on the right the incoming invoice is shown. This way you can make sure the information matches before you click OK and create the purchase invoice.
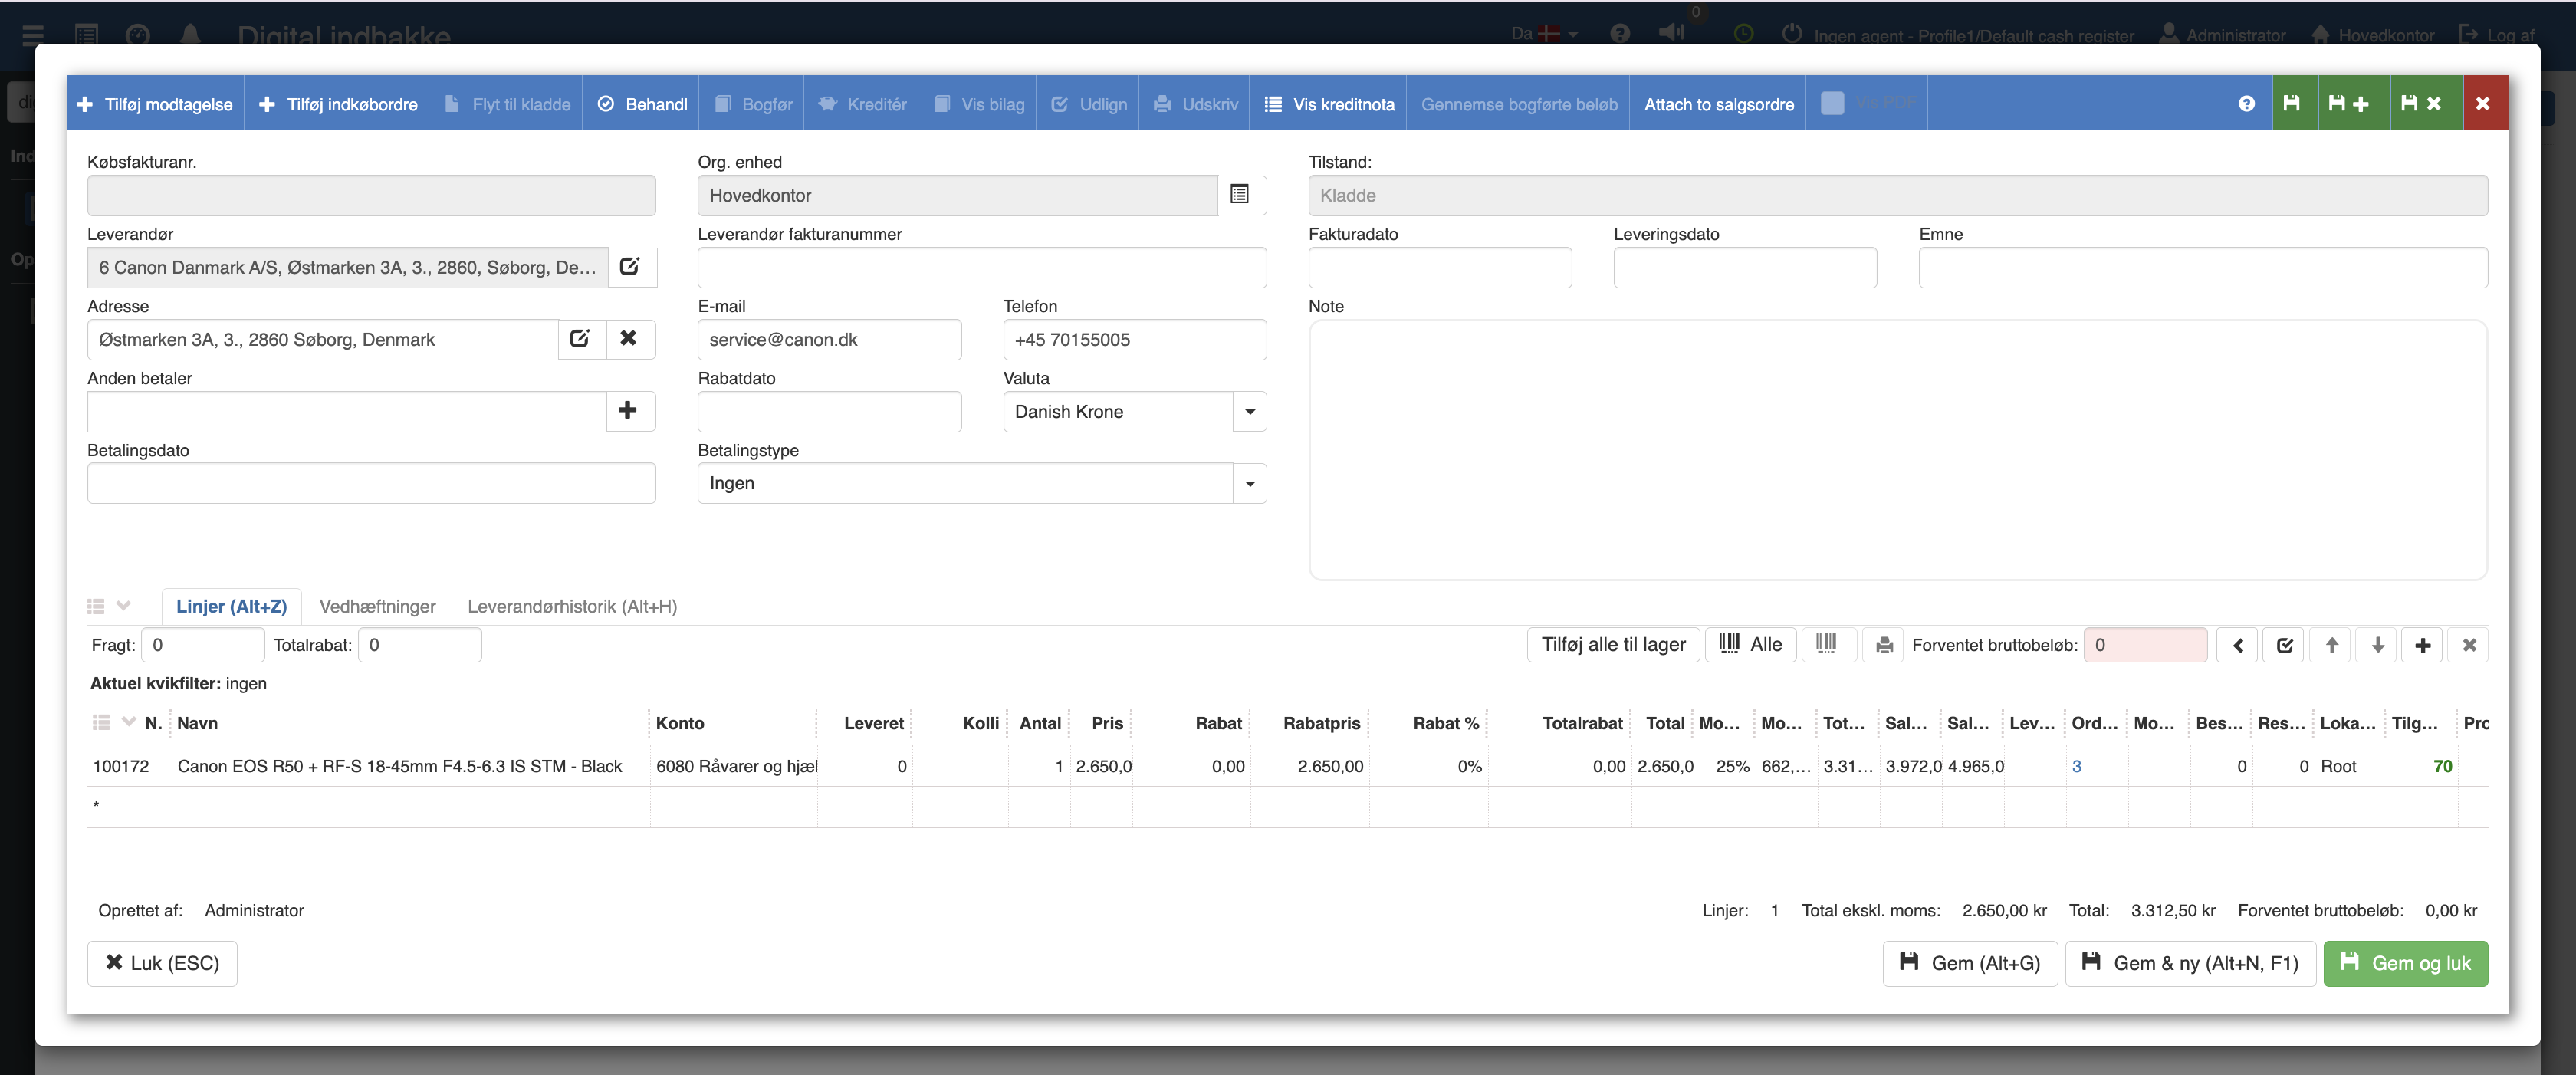
If you choose to create a new purchase invoice, it will look like this:
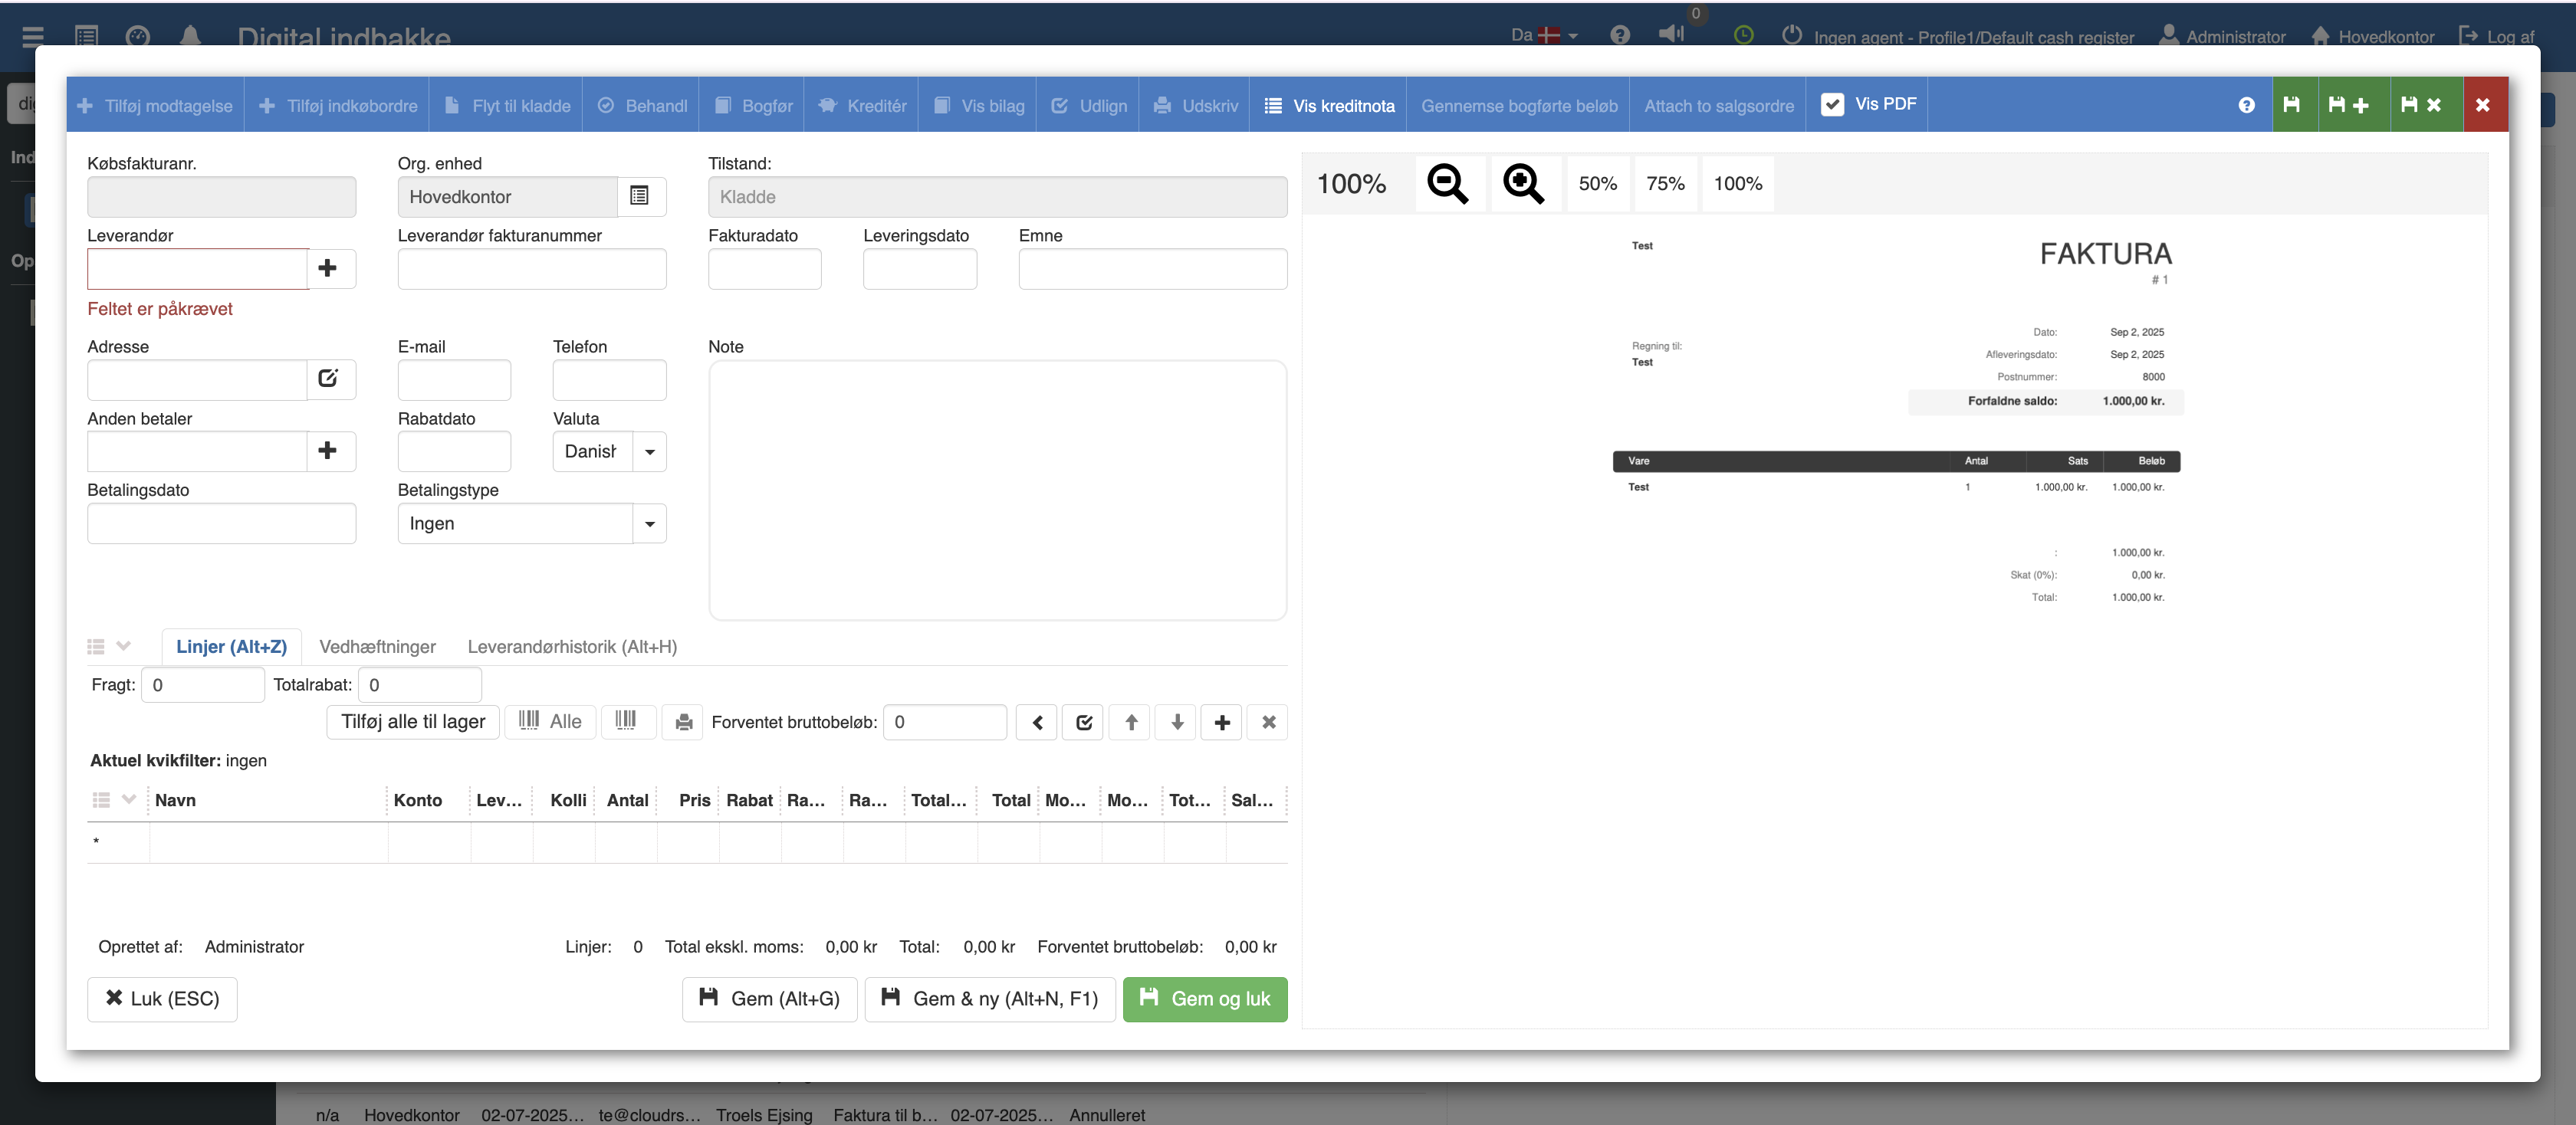
We then add the invoice date, delivery date and the relevant item lines.
When all items and quantities have been added, the purchase invoice contains the same information as the incoming invoice.
By looking at the attached document, we can enter the total gross amount in the box marked in red.
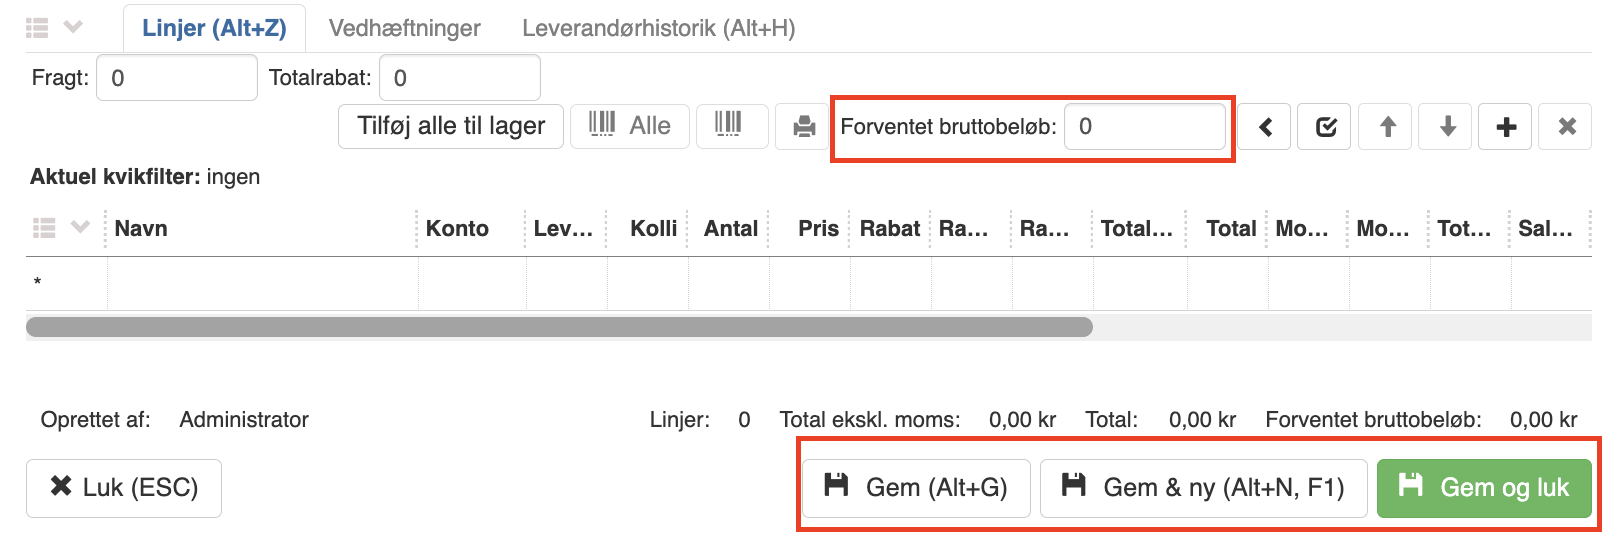
When all information is filled in correctly, the purchase invoice can be saved and closed with the green button “Save and close”.
To post the purchase invoice, it must first be processed:
Click “Process” in the blue navigation bar to prepare the invoice for posting.
When the invoice has been processed, the “Post” function becomes available. Click here to post the invoice.
After posting, the purchase invoice is fully processed. You can find it under the menu “Purchasing” → “Purchase invoices”, where it is also possible to manage and post already created invoices.
If you instead choose “Create document” in the Digital Inbox, a posting journal opens in a popup window.

Here you can manually enter information such as actor, account, amount and VAT type.
On the right side of the window there is a field where you can drag in a PDF (drag-and-drop) or select a file manually.
This makes it possible to quickly attach the invoice directly to the document, without having to click your way through.
The Digital Inbox can also be used for receipts and small outlays that have already been paid.
In these cases it does not make sense to create a purchase invoice – instead the expense is registered directly via Create document. Here you attach the receipt as a PDF and register the amount against e.g. the till, the bank or an outlay account.
The process can also be automated, which eliminates the need for manual entry of items. Contact us at [email protected] if you are interested in hearing more.
If you have purchased AI extraction, the digital inbox can automatically extract data from the first PDF attachment on an incoming email, so the details are ready to become a purchase invoice – without manual entry.
The FIK payment identifier is extracted automatically from incoming emails, so the payment details follow the document over to the purchase invoice.
Want to know more?
Read more in these related articles:
Automatic reading of supplier invoices
Automatic reading of supplier invoices
Documents
How to use Documents in Sapera to create, organize and attach notes and files — with folders, search, moving and permissions.
