The Pos module is designed to give a quick overview of items and functions. The screen is divided into three main areas: navigation on the left, product catalog in the middle and the transaction area itself on the right.
Note:
The general layout in this article is based on the default setup. Be aware that the placement of buttons, tabs and functions may vary, as the system can be customized to the needs of the individual company. Changes to the setup are made under the modules:
Tabs: Customization of item groups and display.
Pos layout: Configuration of button placement and functions.
Pos: General settings for the POS terminal.
Read more in the specific articles for these modules.
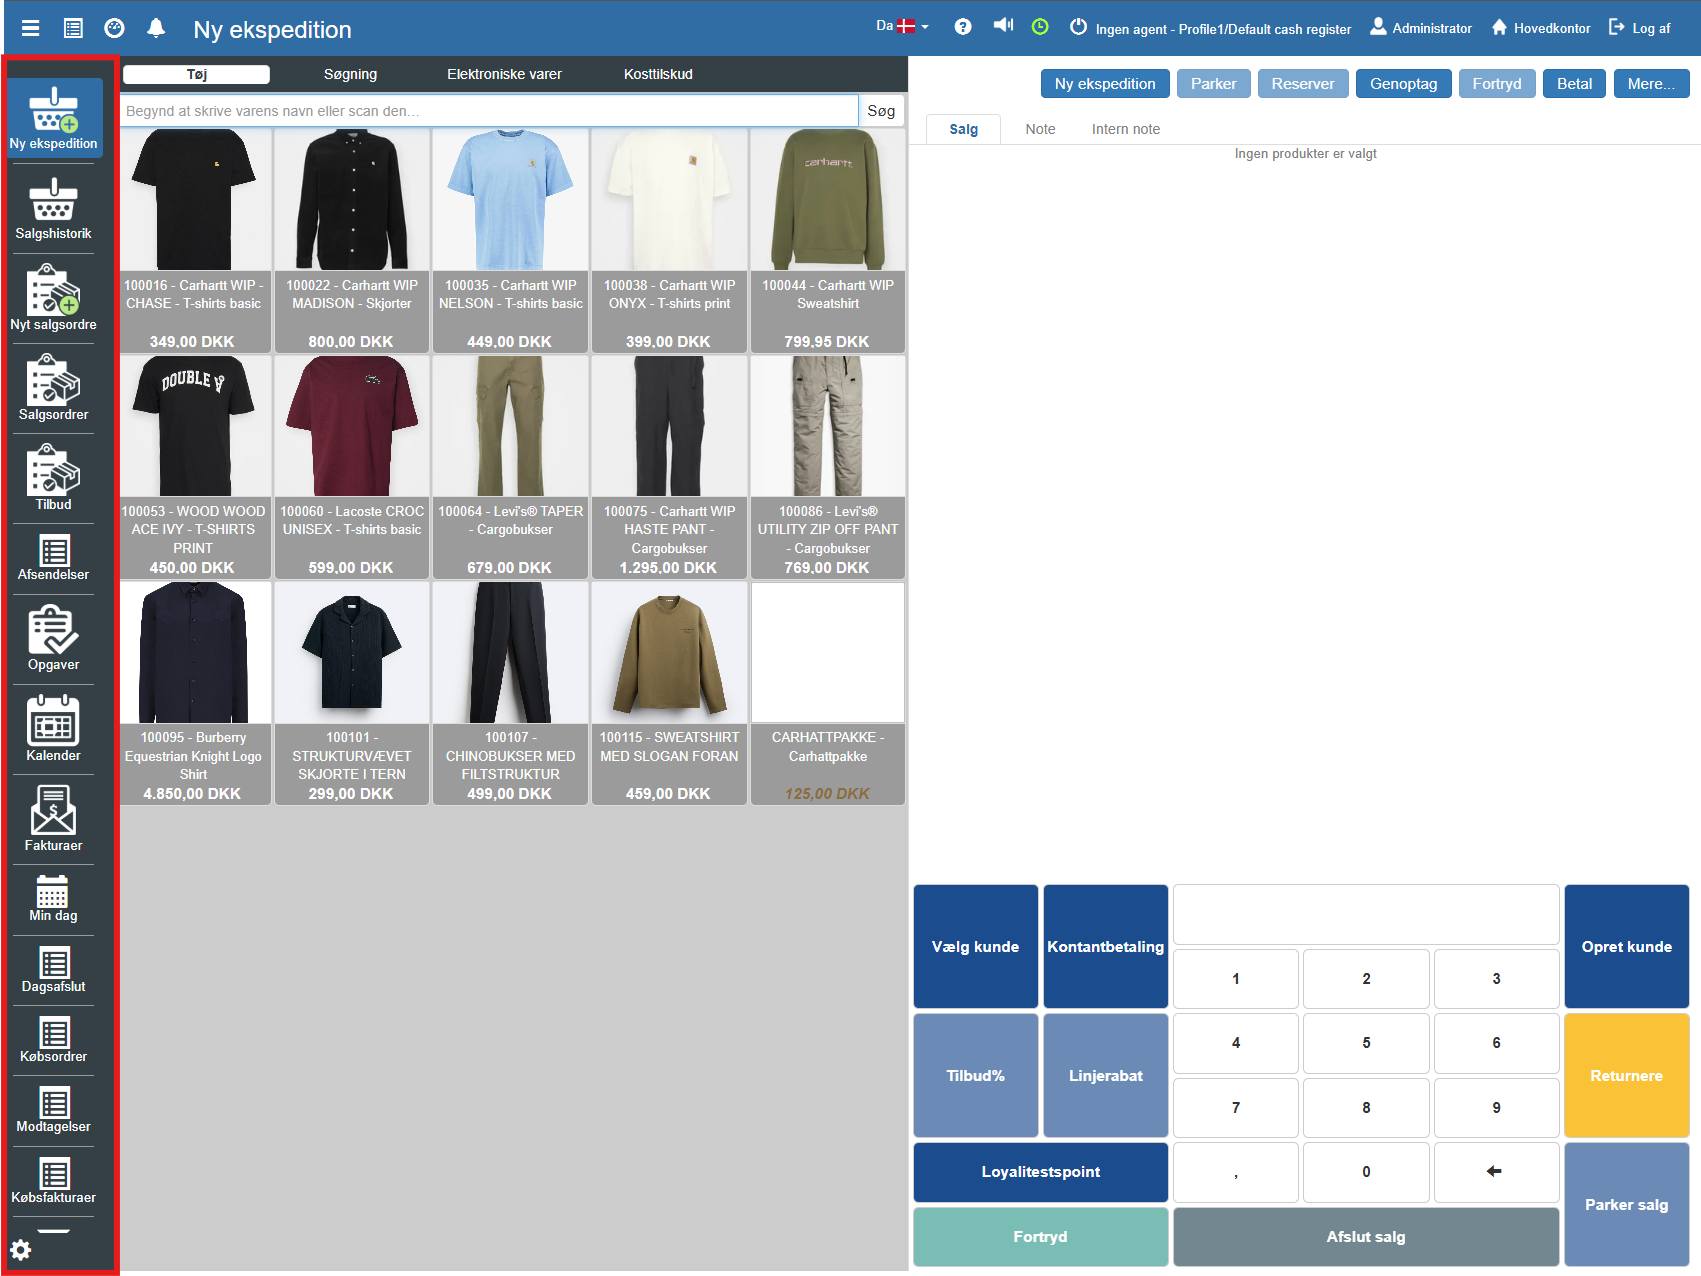
On the left side you find the vertical main menu. This is used to switch between different modules in Sapera.
New transaction: The primary Pos screen, where you handle daily sales (the screen you see by default).
Sales history: Here you can look up previous transactions, reprint receipts or see details about old sales.
End-of-day: Used when the till needs to be settled and the day closed in the system.
Other modules: Depending on your user role, you also have access here to Stock (Receipts/Shipments), Invoices, Tasks and more.
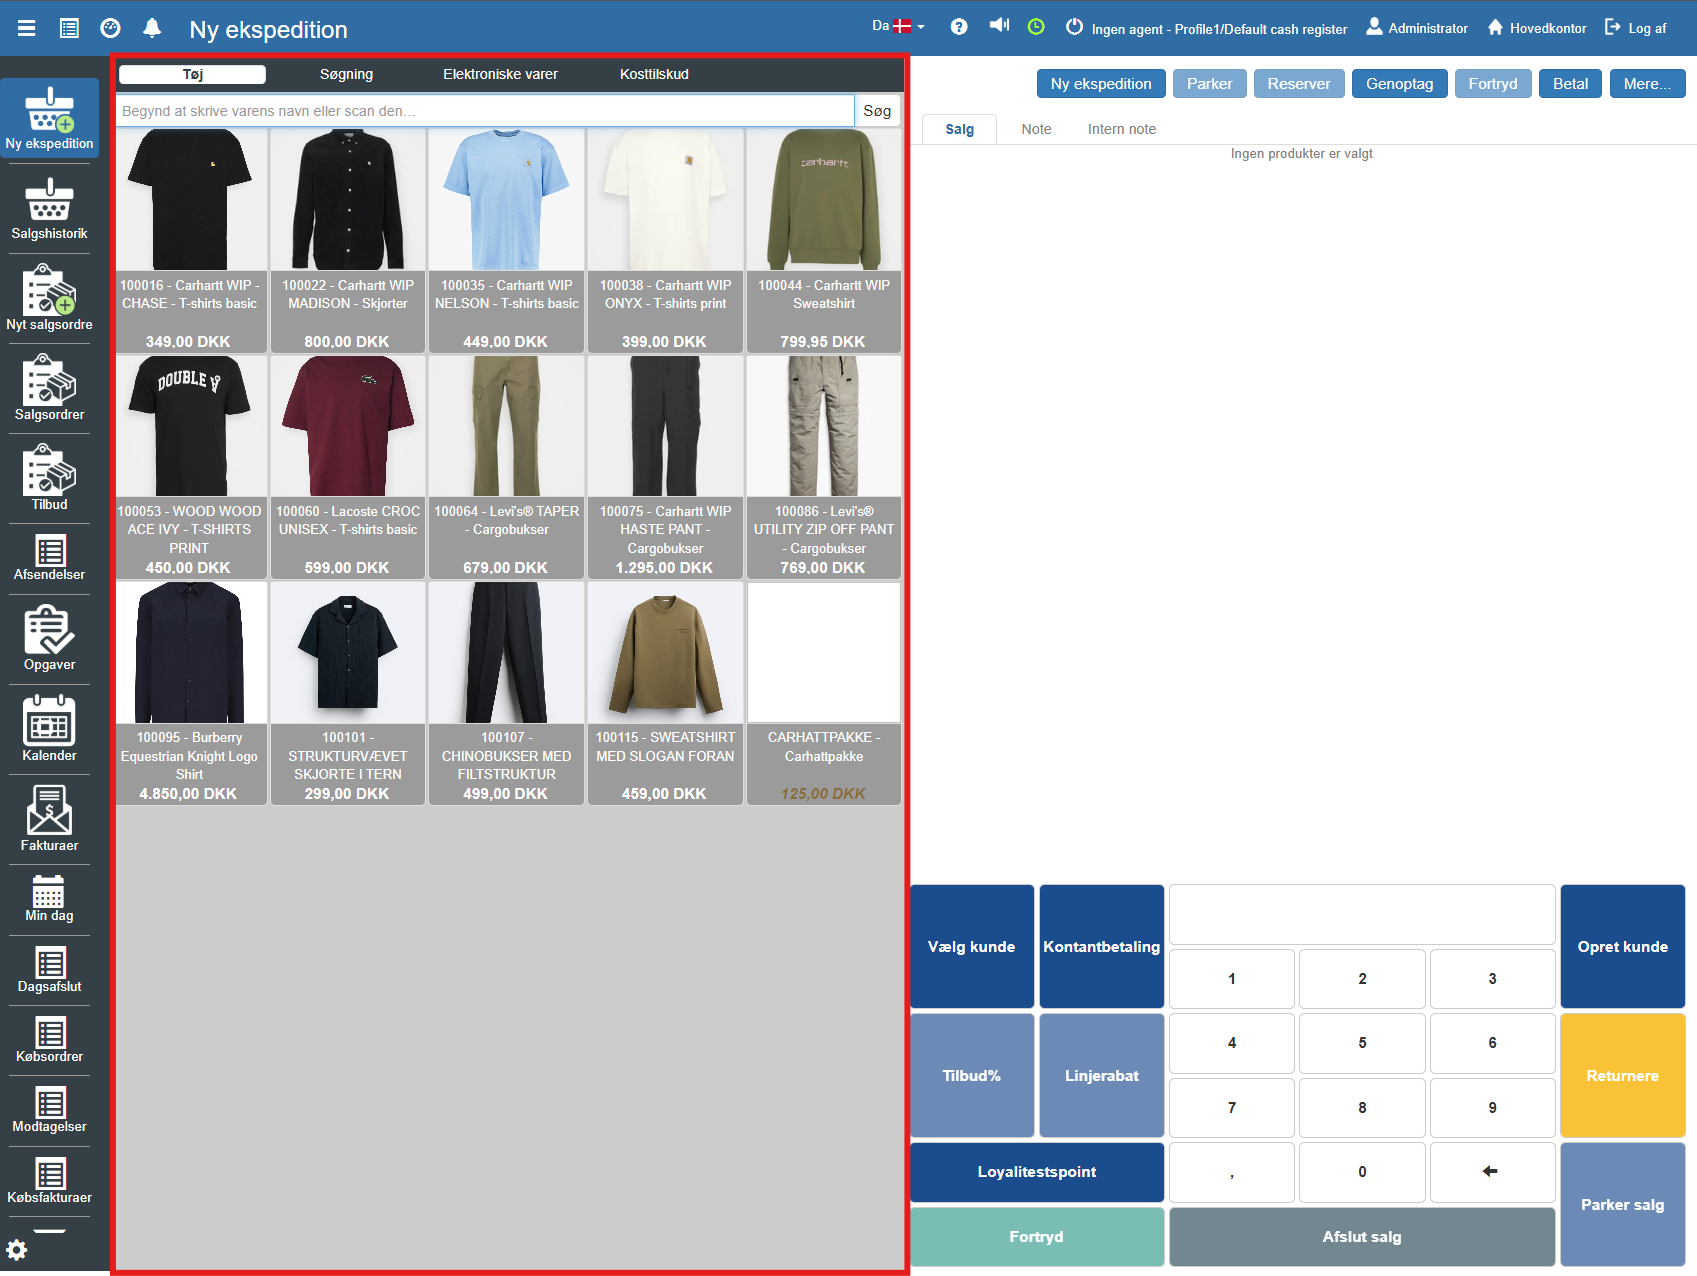
The large area in the middle shows your items.
Item categories (Tabs at the top): At the top you can filter the display by clicking your custom categories such as "Clothing", "Electronics" or "Supplements".
Search field: Here you can scan a barcode or manually search for a product name or item number.
Product card: Each square represents an item. It shows an image, item name, ID and price. A single click on the product adds it to the sales list on the right.
The right side is where the transaction itself is built up and completed.
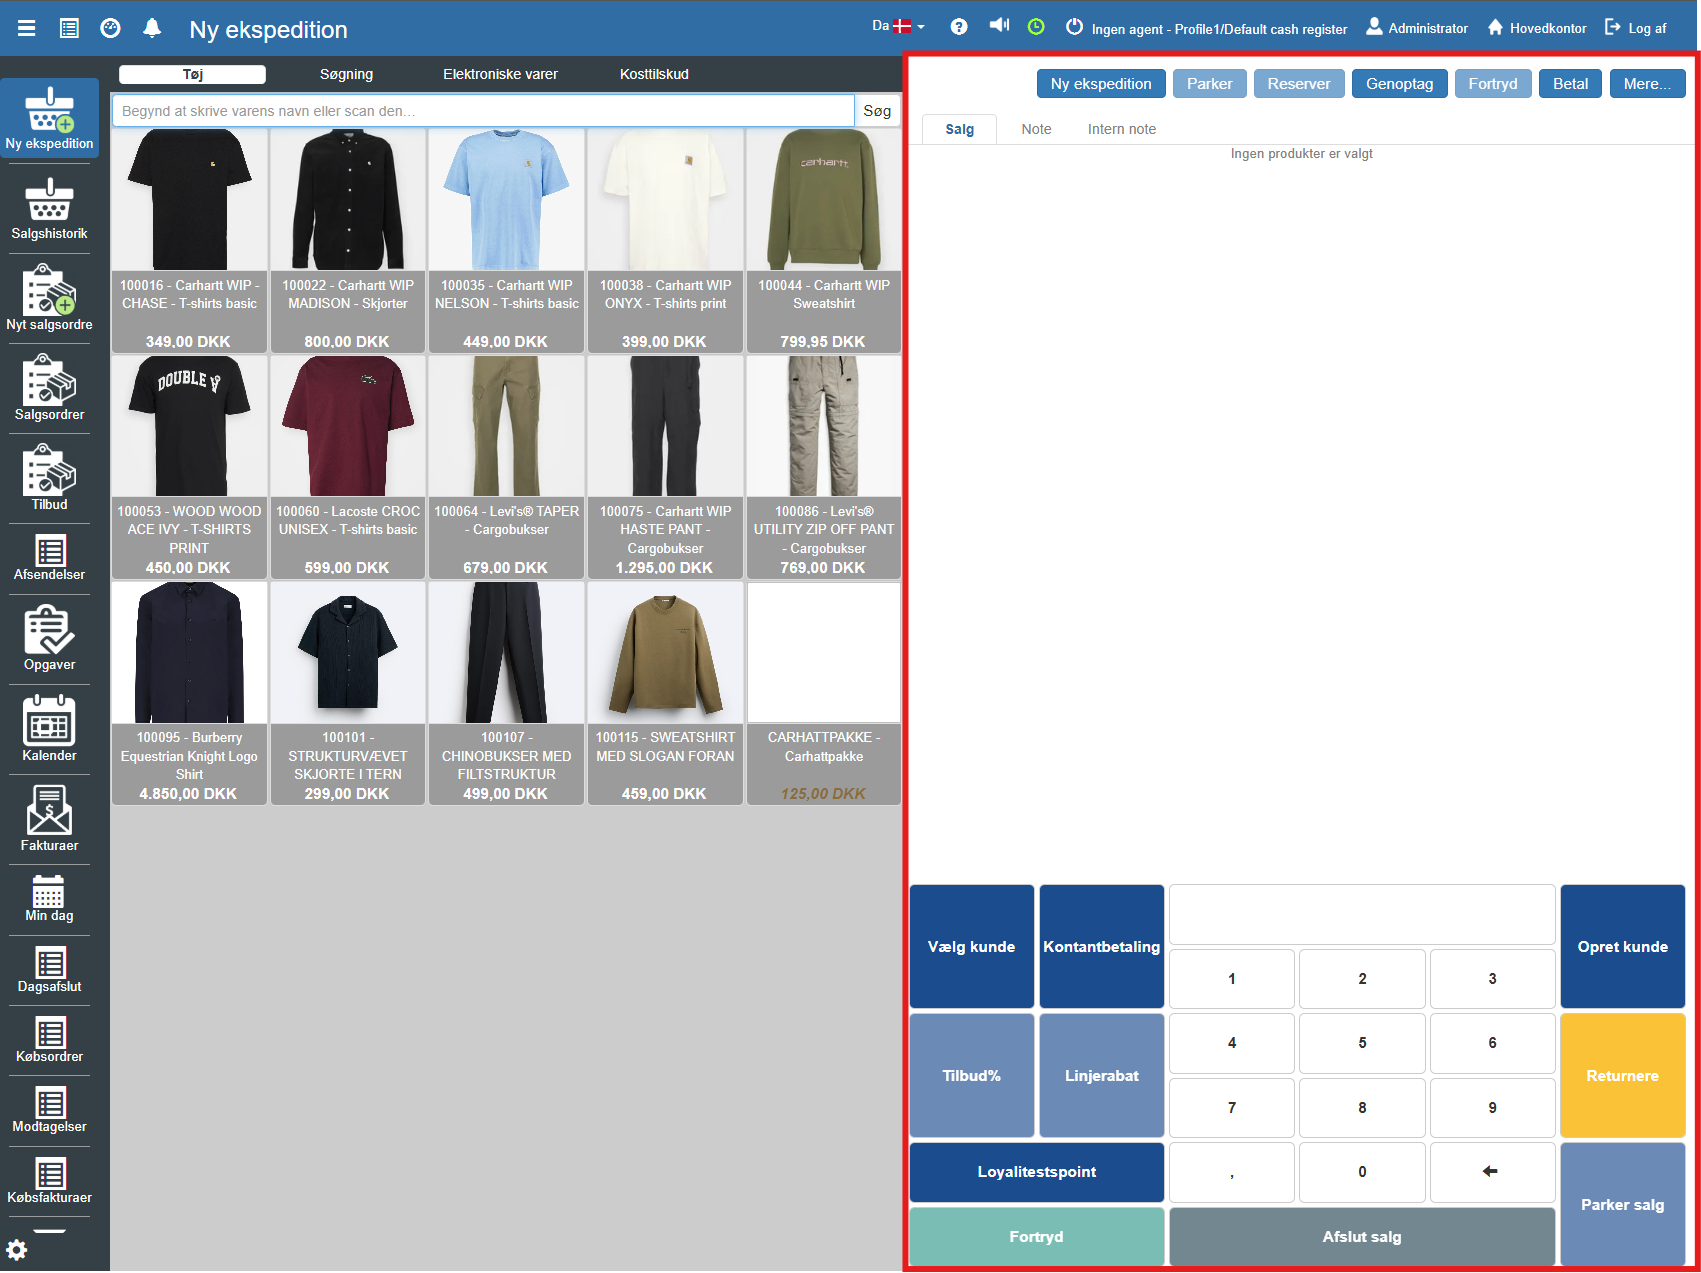
When you scan or click an item, it appears here under the "Sale" tab.
Here you can see the selected products, quantity and total price.
The "Note" and "Internal note" tabs can be used to add remarks to the receipt or the system.
Below the sales list you find the control panel. This is divided into color-coded buttons for a better overview:
Customer and discount functions (Dark blue)
Select customer: Link an existing customer to the sale (important for loyalty or history).
Create customer: Create a new customer profile directly from the Pos.
Offer% / Line discount: Used to give a percentage discount on the entire purchase or a single item line.
Loyalty points: Management of earned points, if you use a loyalty program.
Payment and completion
Cash payment: Shortcut for quick cash settlement.
Complete sale (Grey): The primary button for going to the payment window, where you can choose card payment, MobilePay and more.
Return (Yellow): Switches the Pos to return mode. Used when a customer is to receive money back for an item.
Parking and cancellation
Park sale: Temporarily saves the current transaction (e.g. if the customer has left their wallet in the car), so you can serve the next customer in the meantime.
Undo (Green): Cancels the ongoing action or deletes the entry.
The top menu (Top right) At the very top of the right corner there is a row of system buttons that supplement the functions at the bottom:
Resume: Brings a parked sale back up again.
Reserve: Used to reserve items for a customer without completing the payment now.
Want to know more?
Read more in these related articles:
Pos transaction
Settings for the Pos sales experience: sales flow, payments, security codes, cart and screen layout.
Creating a sale
This article reviews the process of creating a new transaction, adding items to the cart and completing the sale via the Pos module.
New transaction
How to start a new transaction in the Pos by selecting a clerk and beginning the sale.
