In Sapera, returned items can be handled in several ways depending on the situation. Below are the three primary procedures for registering a returned item.
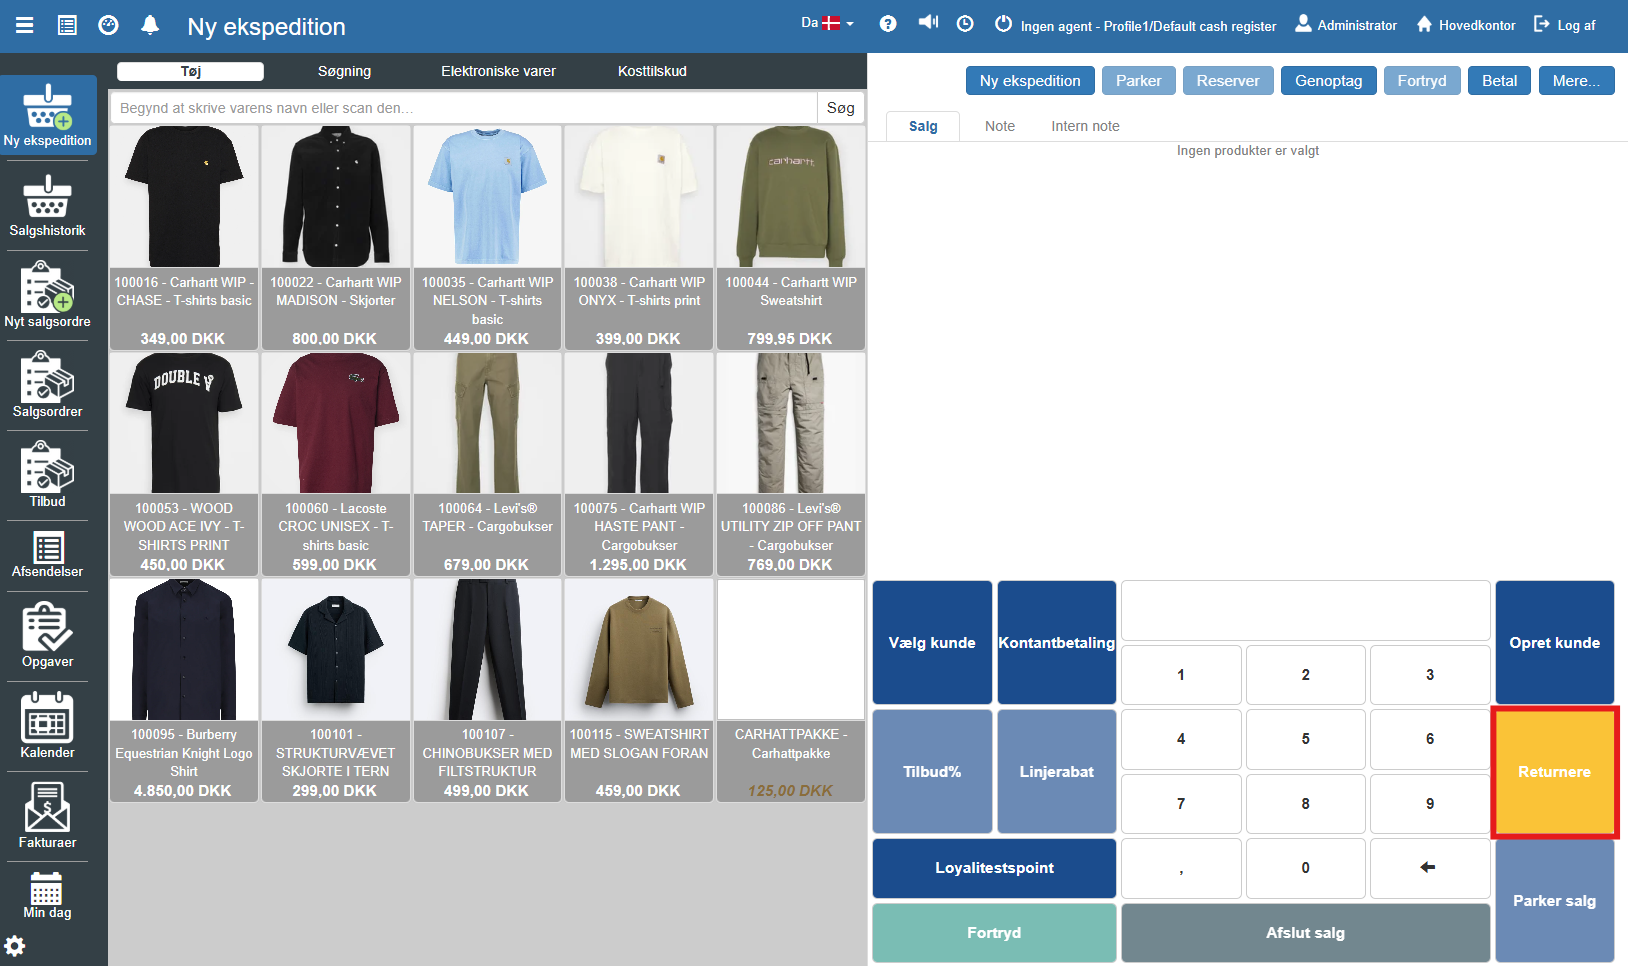
To start a return, the POS must be put into return mode. This is done by clicking the yellow “Return” button on the keypad in the bottom right.
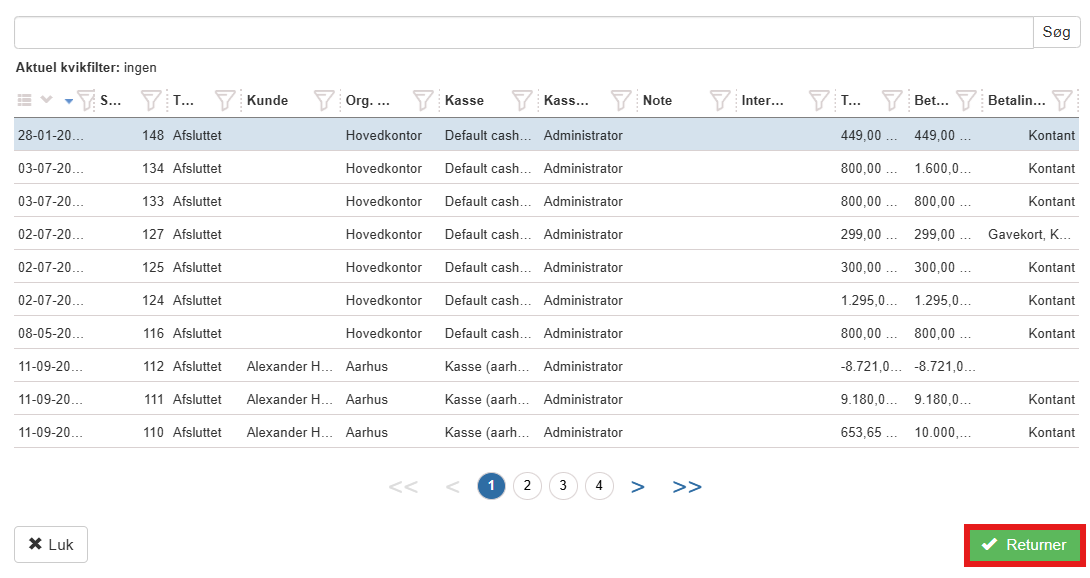
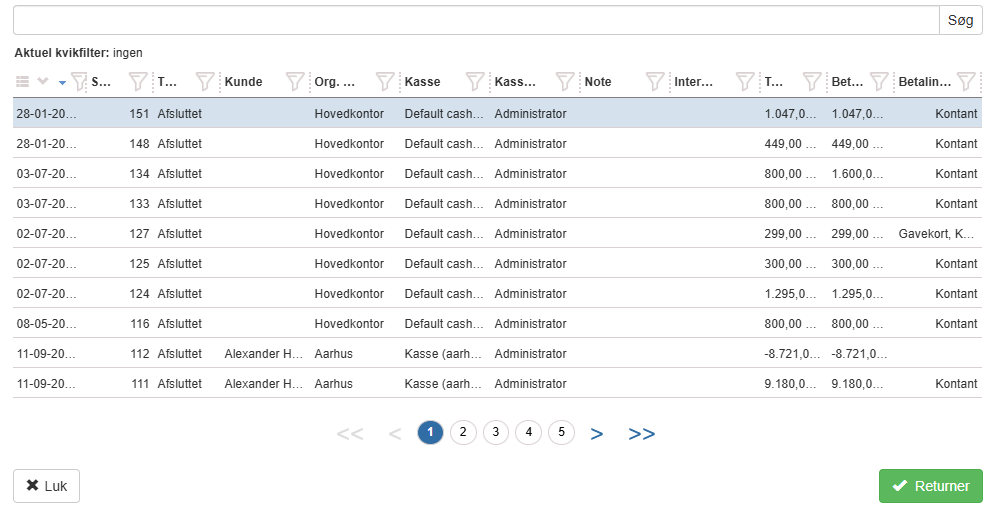
An overview of previous sales will now open. Find the relevant receipt in the list by searching by date, receipt number or the customer's name. Mark the line for the desired sale and click Return in the bottom right corner:
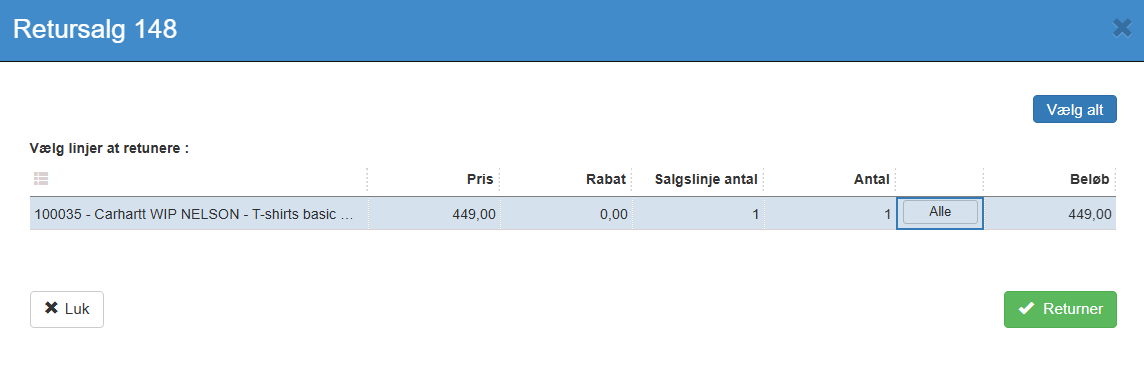
A dialog box titled "Return sale" will then open. Here you specify what is to be returned:
Select all: Click the button Select all in the top right if the customer wants to return the entire purchase.
Individual selection: If only parts of the purchase are to be returned, mark the specific item lines in the list. The quantity can be adjusted in the "Quantity" column.
When the correct items have been selected, click the button Return in the dialog box to proceed to payment.
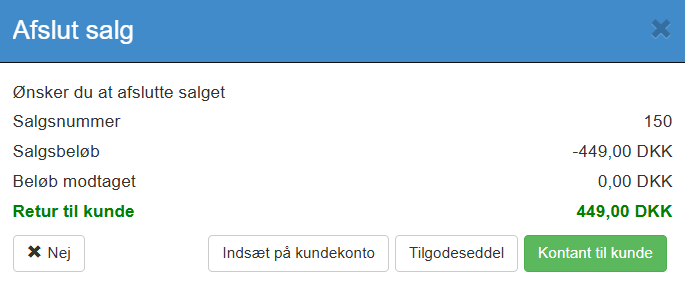
After selecting the customer that already exists in the system, the return can now be completed with "Complete sale", where the total return amount is shown in green text ("Return to customer"). Select the desired payout method:
Cash to customer: Select if the amount is paid out in cash from the register.
Credit note: Prints a credit note that the customer can use for a later purchase.
Deposit to customer account: Deposits the amount to the customer's account in Sapera (requires the sale to be linked to a created customer).
When a method is selected, the transaction is completed, and the stock is updated automatically.
If you need an alternative entry point to the return module, this can be done via the main menu at the top.
Menu: Click the “More...” button in the top right of the POS screen.
Function: Select the item “Return a sale” from the list.
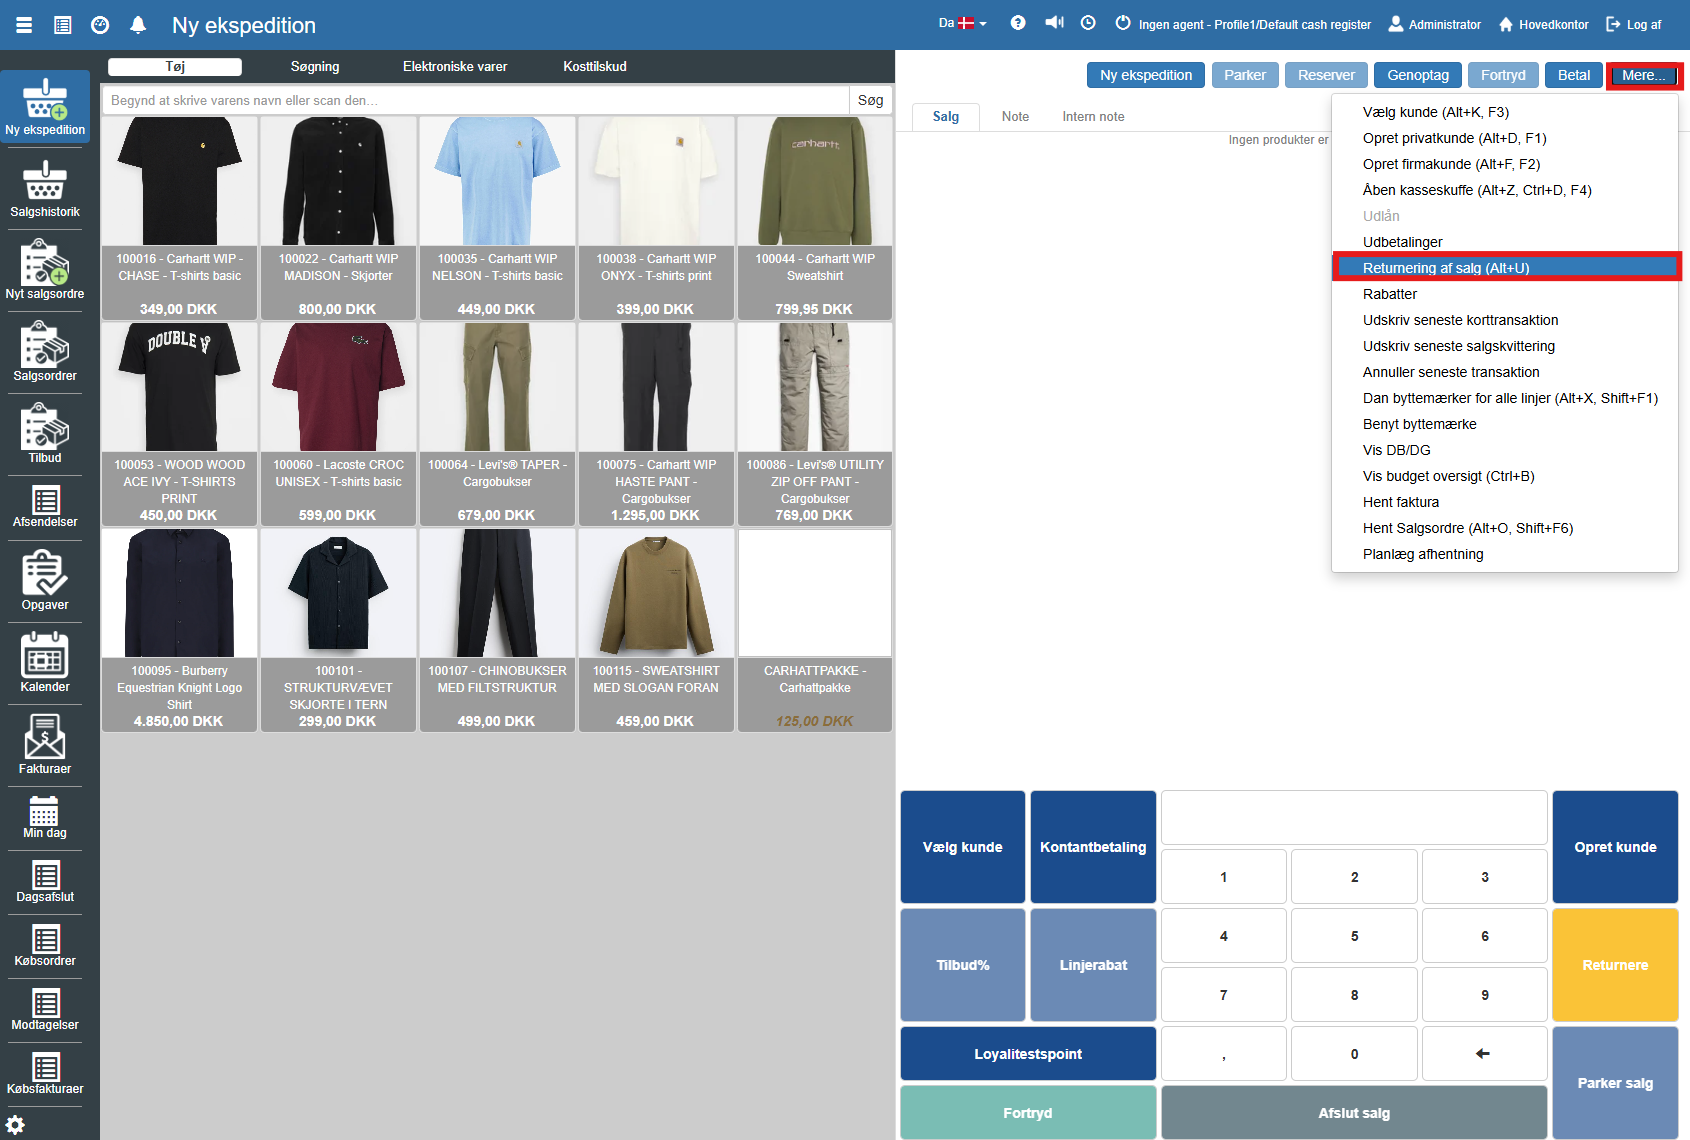
Search: Enter the receipt number or search for the order in the list, then follow the same procedure for selecting items as described above
This method is typically used if you are holding the item and want to turn it into a returned item directly on the transaction list without looking up the original receipt first.
Scan the item: Scan the item or find it in the item catalog so it lands on the sales list at the normal price.
Item menu: Click the three small dots (settings) next to the relevant item line.
Change to return: Select the “Return” function in the menu. The item line will now change to receiving change.

Want to know more?
Read more in these related articles:
Creating a sale
This article walks through the process of creating a new transaction, adding items to the cart and completing the sale via the POS module.
Return an order
Return an order
Returned items to customer
Returned items to customer
