Once you have physically received goods from your supplier and have a corresponding receipt created in the system, the items must officially be "added to stock" before they count towards your inventory and can be sold to customers.
Follow these simple steps to update your stock balance:
Go to the overview of receipts. The new receipt awaiting to be added to stock will typically have the state "Draft".
Select the relevant receipt by clicking on the row (it is highlighted in blue).
Click the Add to stock button in the blue top menu.
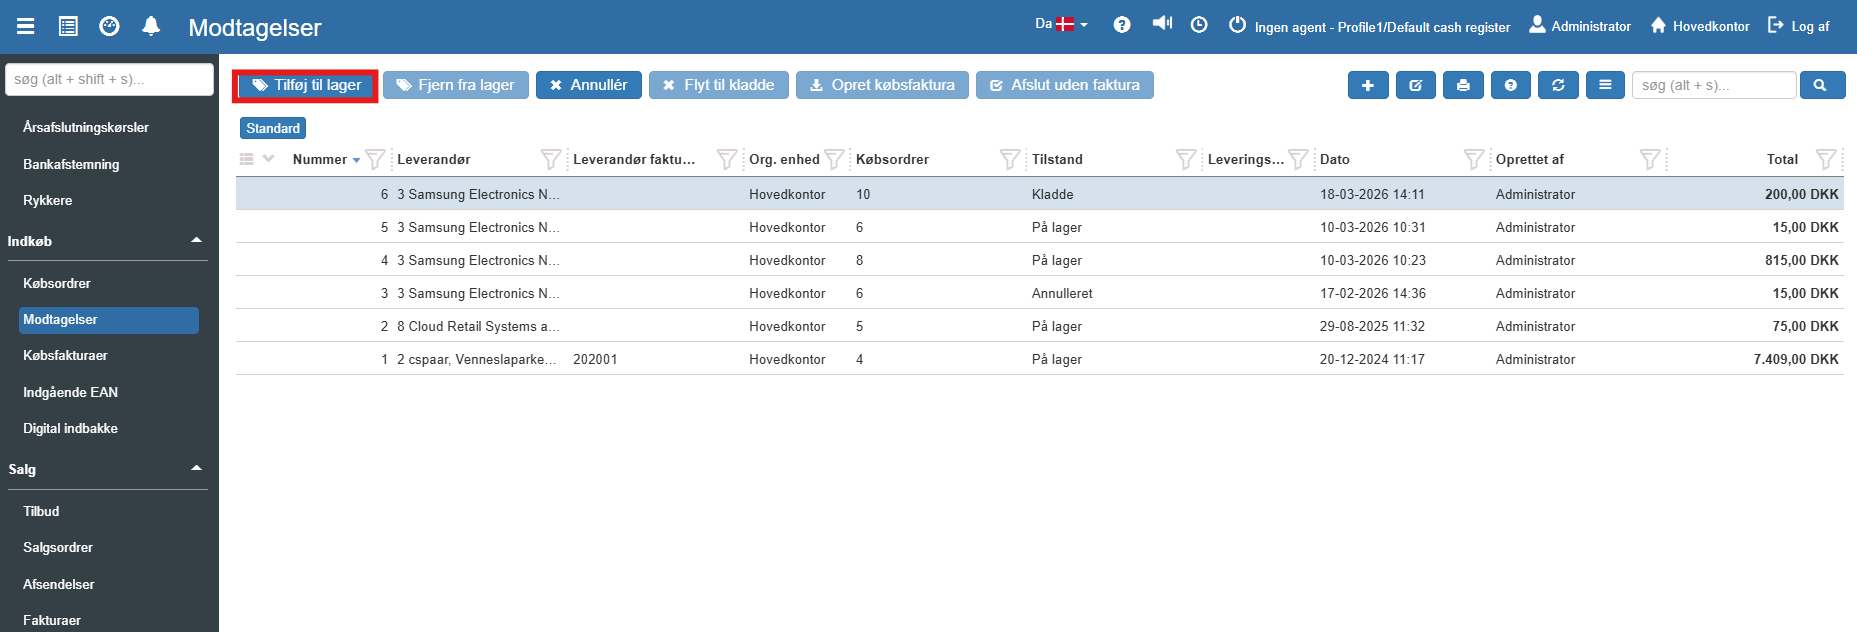
The system now automatically updates your stock balance with the relevant items. The receipt's state will then change from "Draft" to "In stock" to confirm the action.
Tip: If you accidentally added a receipt to stock, the action can be rolled back. Simply select the relevant entry (with the state "In stock") and click the Remove from stock button in the top menu.
Once the items have been added to stock, the receipt needs to be finalised. By selecting the receipt, you have two options in the top menu for completing the process:
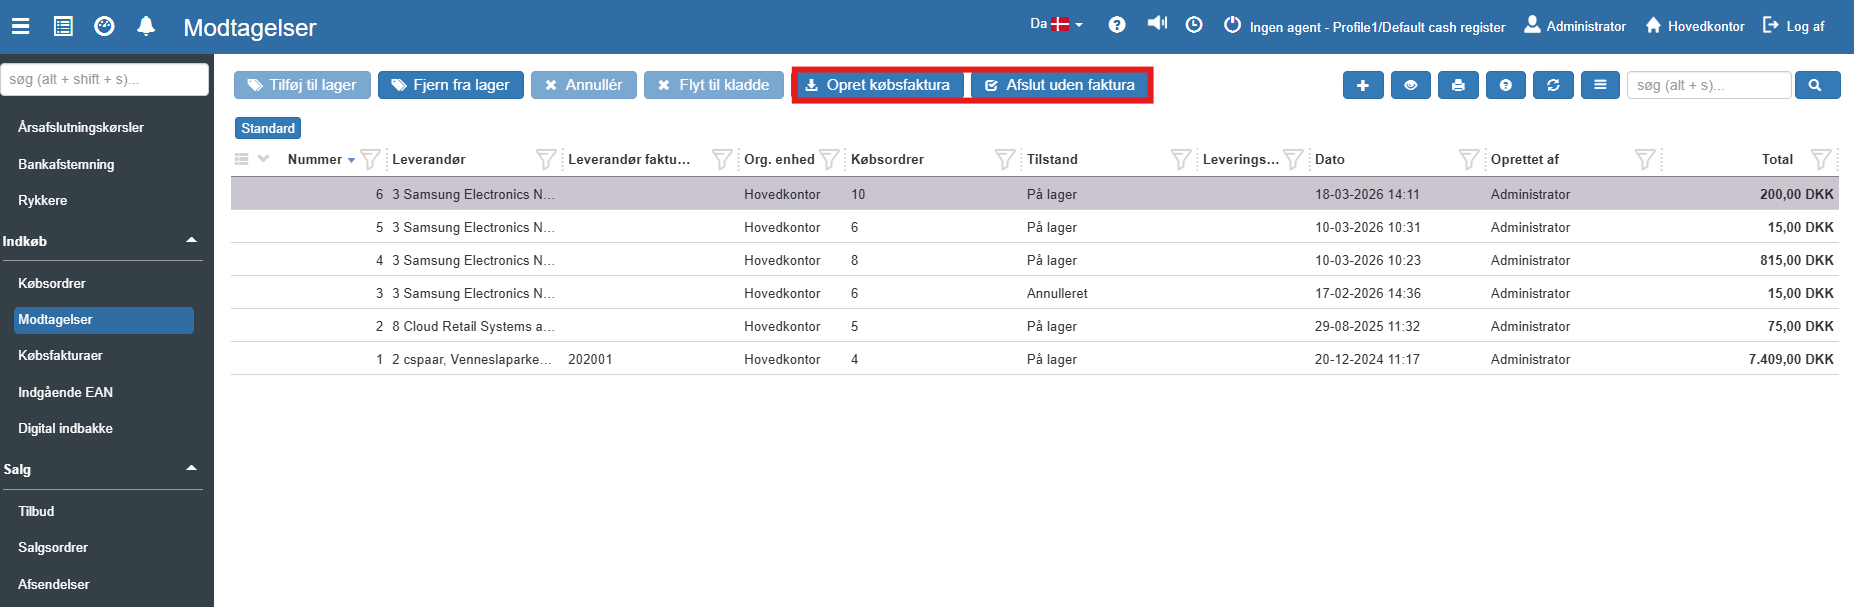
Create purchase invoice: This function is used in the vast majority of cases. When you click here, Sapera takes you directly to the creation of an invoice based on the exact items and quantities you have just received. (See the guide Create purchase invoice from receipt).
Complete without invoice: This function is used if you have received items for which there will not be a bill – for example free samples, or in the case of a warranty replacement. The function closes the receipt in the system without requiring a financial posting. The function can also be used to complete a partially delivered/invoiced receipt, i.e. nothing further happens.
Create purchase invoice from receipt
This quick guide explains step by step how to turn a registered goods receipt into a finished purchase invoice in Sapera.
