In Sapera, quick filters can be used as an effective tool to tailor overviews precisely to your needs.
It is possible to select specific columns to be visible, and additionally to apply filters to selected columns, for example to show only sales orders with the status 'invoiced'.
You can create and save an unlimited number of quick filters for each individual overview. The saved quick filters can optionally be placed at the top of the overview, so they can be accessed quickly as a shortcut:
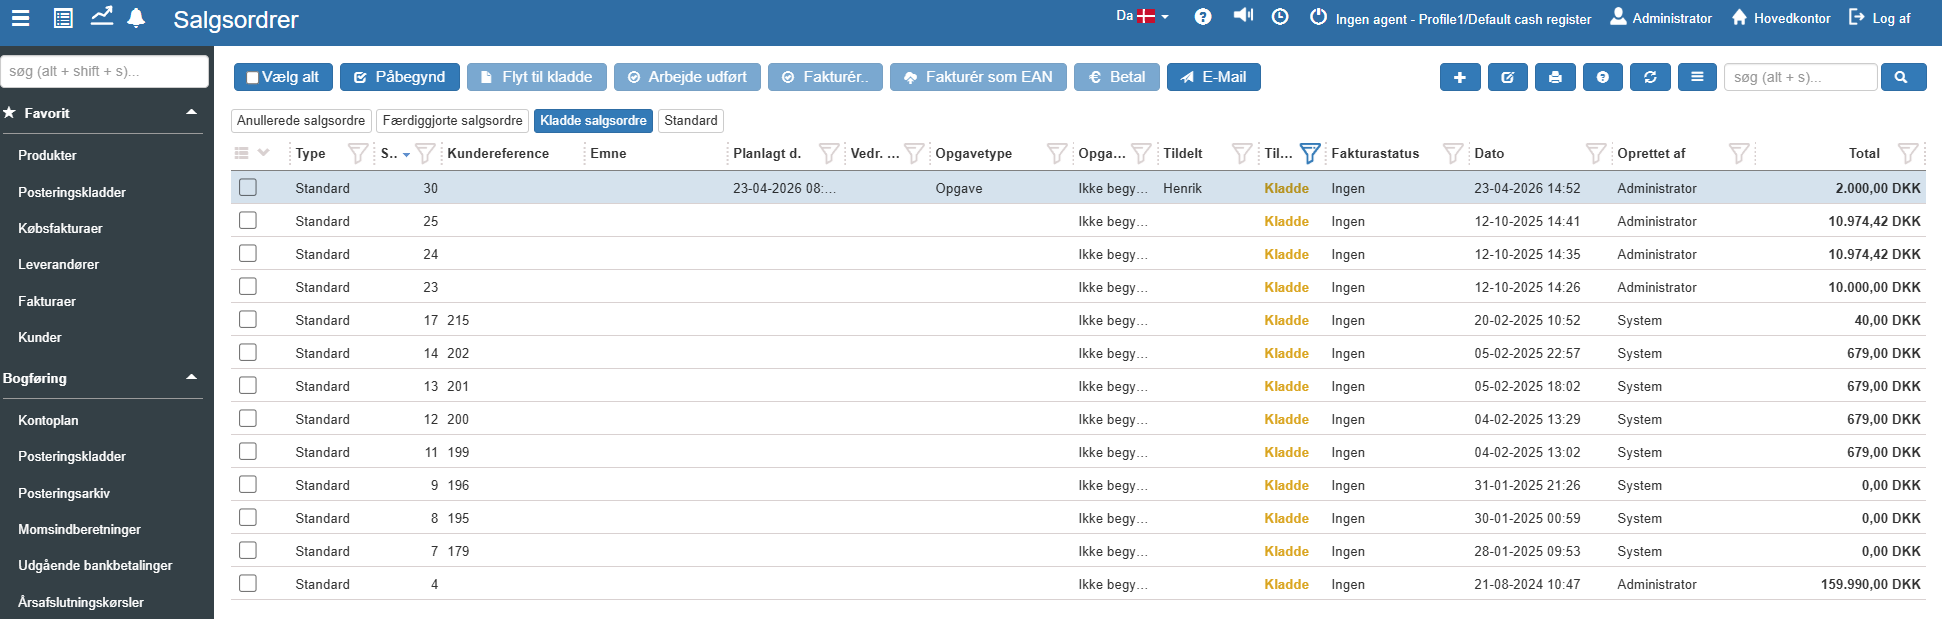
In the example above, four different types of quick filters are mentioned:
Completed sales orders: This filter shows all sales orders that have been invoiced.
Cancelled sales orders: This filter shows all sales orders that have been cancelled.
Default: This filter shows all sales orders.
Draft sales orders This filter shows all work cards that are still in draft state..
To set up these quick filters, first select the relevant columns to be shown, and then customise the desired filters.
The first step towards the perfect overview is to specify which columns you want to display in your module:
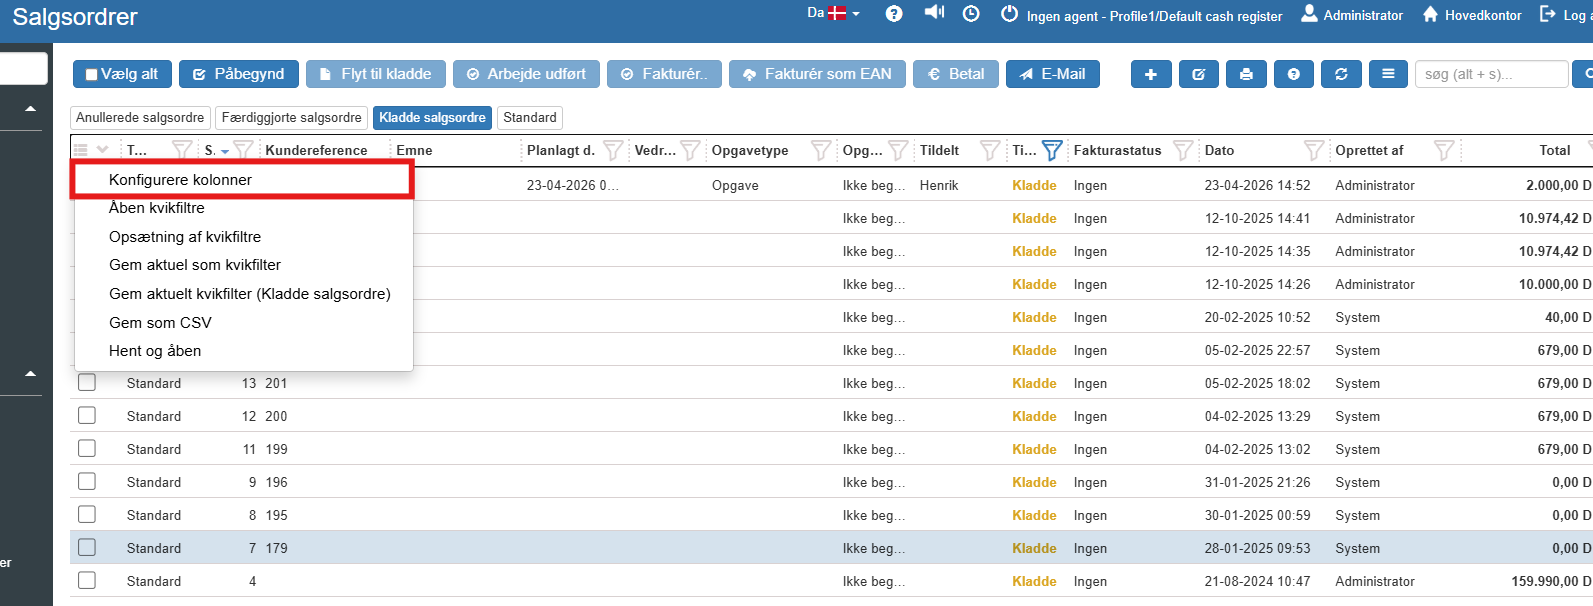
Press the Configure columns button in the quick filters menu (located in the leftmost column):
A dialog box now opens. Here you can specify whether the individual columns should be shown on Web (desktop), Tablet, and Phone respectively. This makes it possible to build a light and clear view for, for example, mobile phones, where screen space is limited.
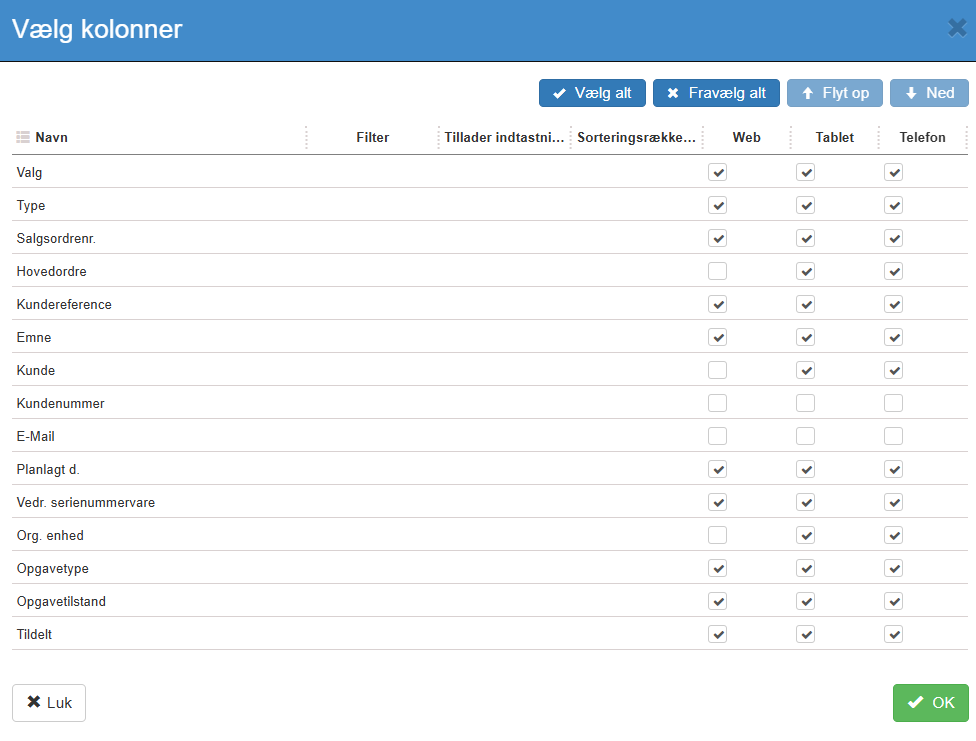
You can use the Select all or Deselect all buttons to quickly enable or remove all columns across the platforms.
The order of the columns in the overview can be adjusted by using the functions to move up and down in the list.
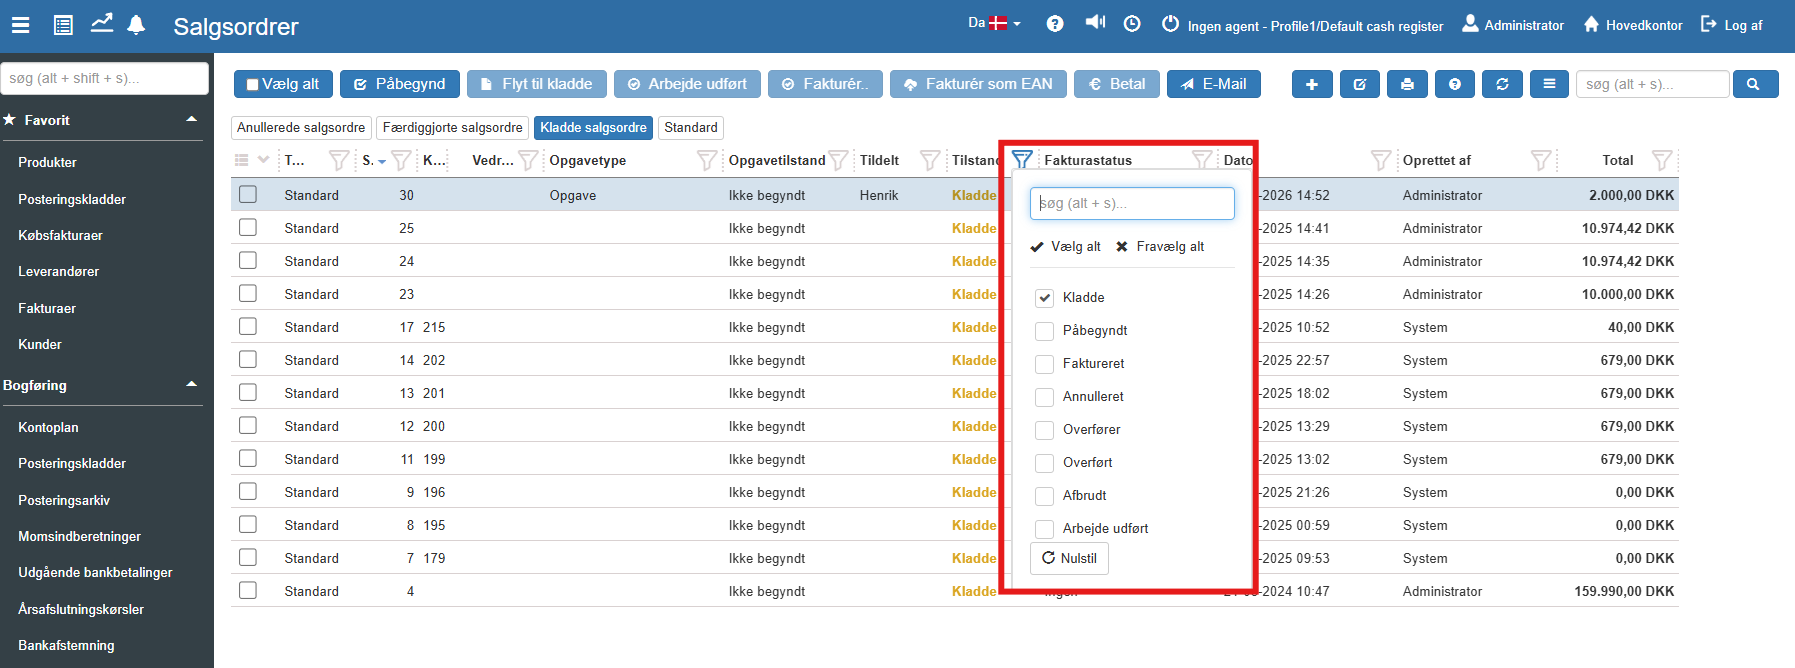
A column filter is customised by clicking the funnel in the "State" column:
When the current overview has been customised and shows the data you want, this configuration can be saved as a quick filter.
When your overview has been customised and shows exactly the data and columns you need, the configuration can be saved as a fixed quick filter:
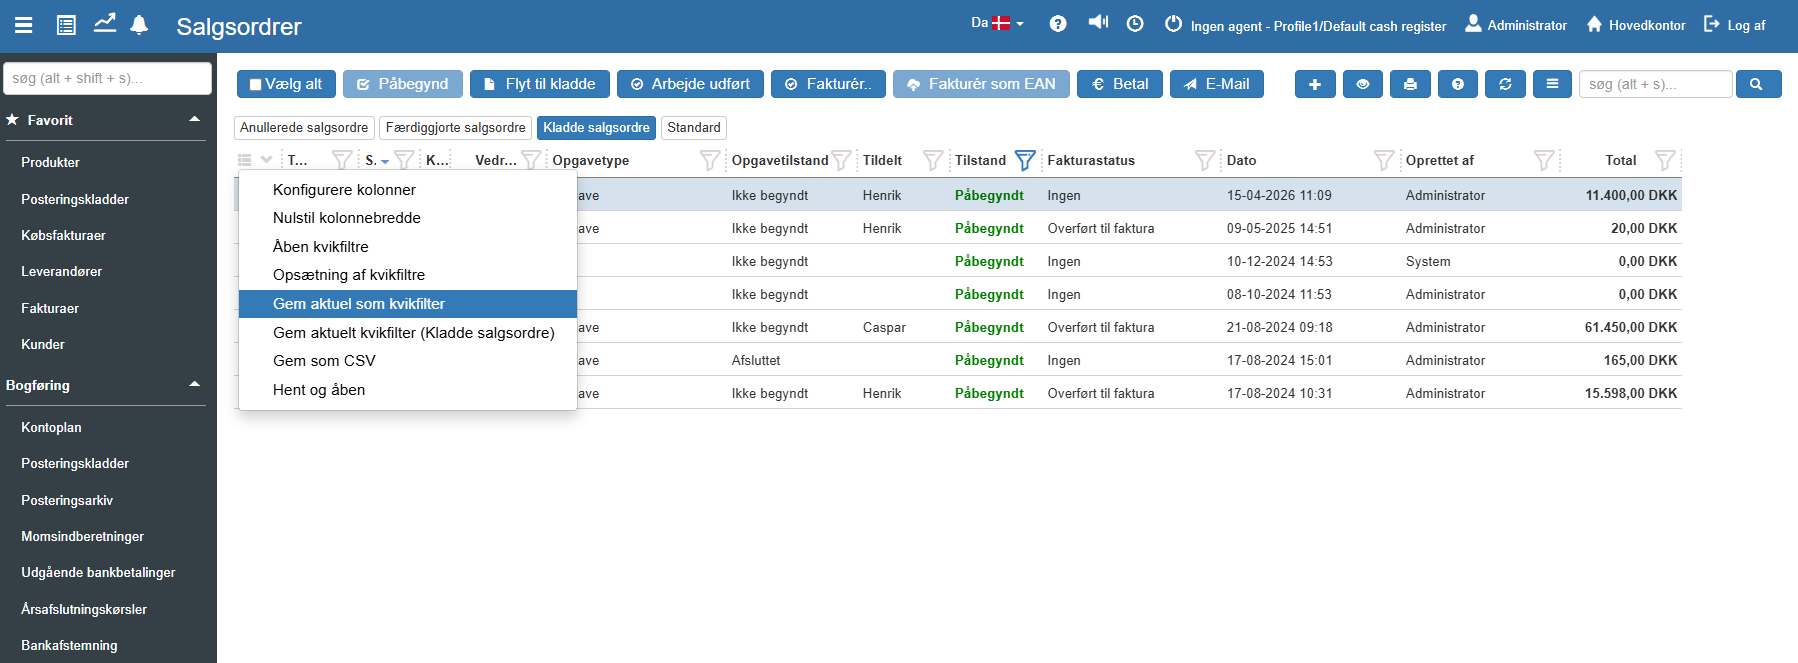
Select the option Save current as quick filter in the menu:
Enter a descriptive display name for your new filter:
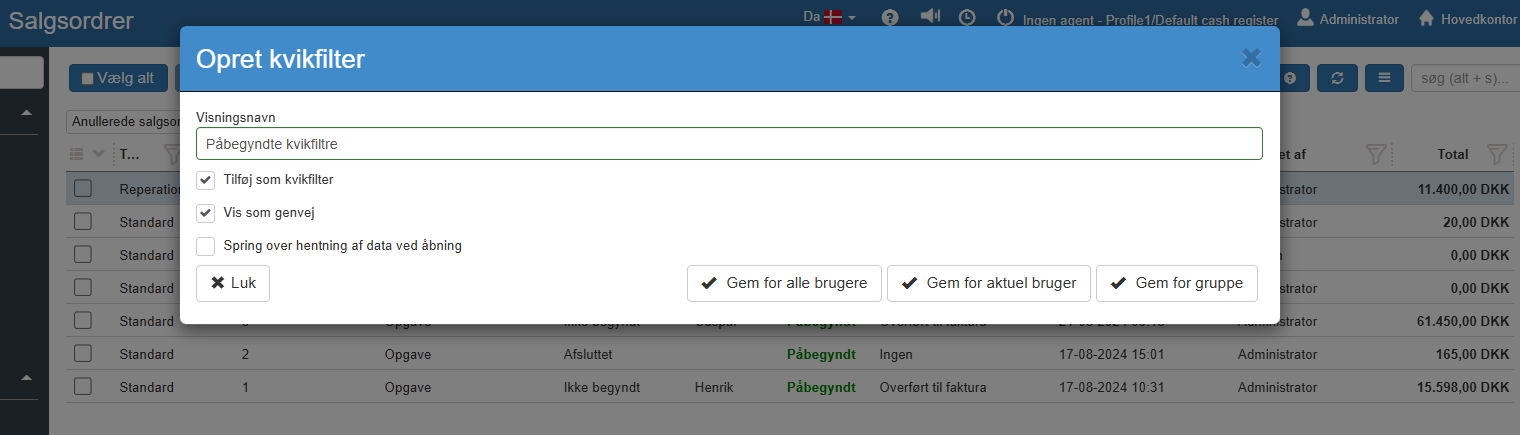
Tick Add as quick filter, if the filter should be available from the default selection list (which is opened via the zigzag icon next to the menu).
Tick Show as shortcut, if the filter should be shown as a button directly at the top of the overview. The shortcut button will be white, but turns blue when it is activated.
Finally, you must specify the permissions. Choose between Save for all users, Save for current user or Save for group (the latter opens a new box where you can specify the desired user group).
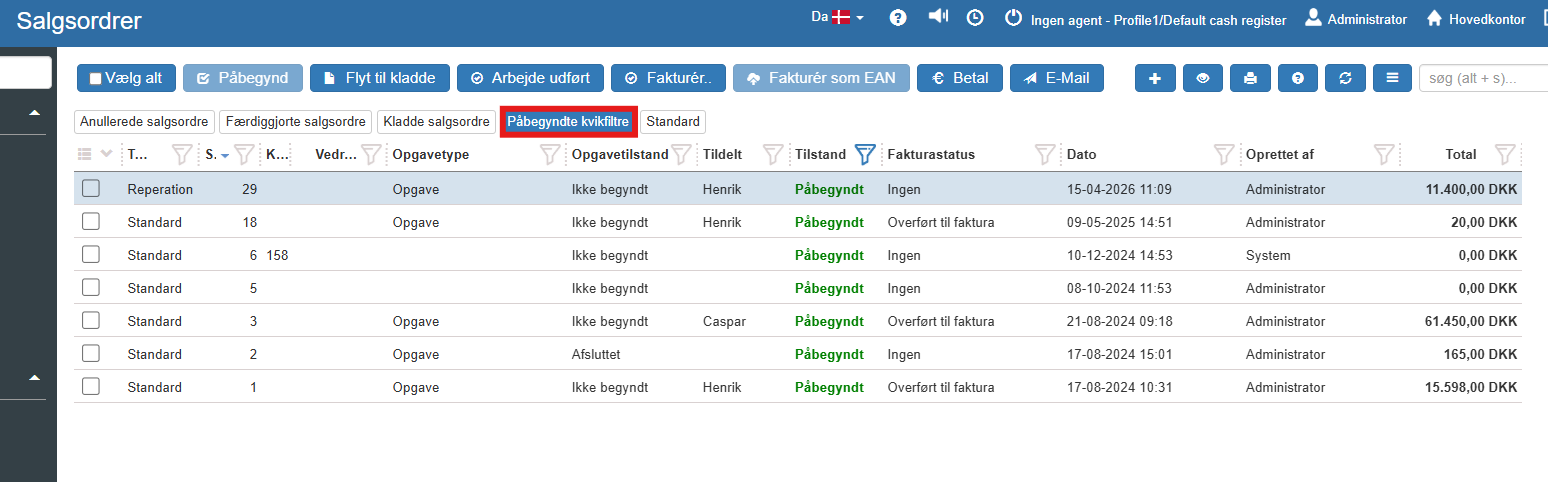
Your new quick filter will now be available as a shortcut together with your other filters:
The quick filters menu also gives you access to a number of other useful tools for managing your overview:
Open quick filters: Shows a complete list of all the configured quick filters. You can search for a specific filter and press Ok to activate it.
Quick filter setup: From here you can manage existing filters. Press Edit to change the name and shortcuts, or use Delete to remove a filter. Here you can also use Set as default for current org. unit or Select as default (global), if the filter should be the default view for your department or all users in the system respectively.
Save current quick filter: A quick function to save changes and directly overwrite the quick filter you currently have active.
Reset column width: Resets the width of all columns to the system default.
Save as CSV: An extremely practical function that lets you download the current, filtered overview to your computer, so you can process the data further in, for example, Microsoft Excel.
Want to know more?
Read more in these related articles:
Using quick filters
Using quick filters
Quick filters and lists
Tailor and save filters on the overviews in Sapera.
How to search in lists
How to use the search field in lists in Sapera: free-text search, search with multiple words, and how a leading plus sign targets the search to one specific field (document number on document lists, product name on product lists). Also explains sorting and column filters.
