When you have created a new order (see the guide Creating sales orders), it will by default have the state "Draft". To turn the order into a real sale and an invoice, it must go through a short flow in the sales order module.
The first step is to mark that the work or the handling of the order has been started.
1. Go to Sales -> Sales orders and search for your order.
2. Select the sales order in the overview.
3. Click the Start button in the top menu.
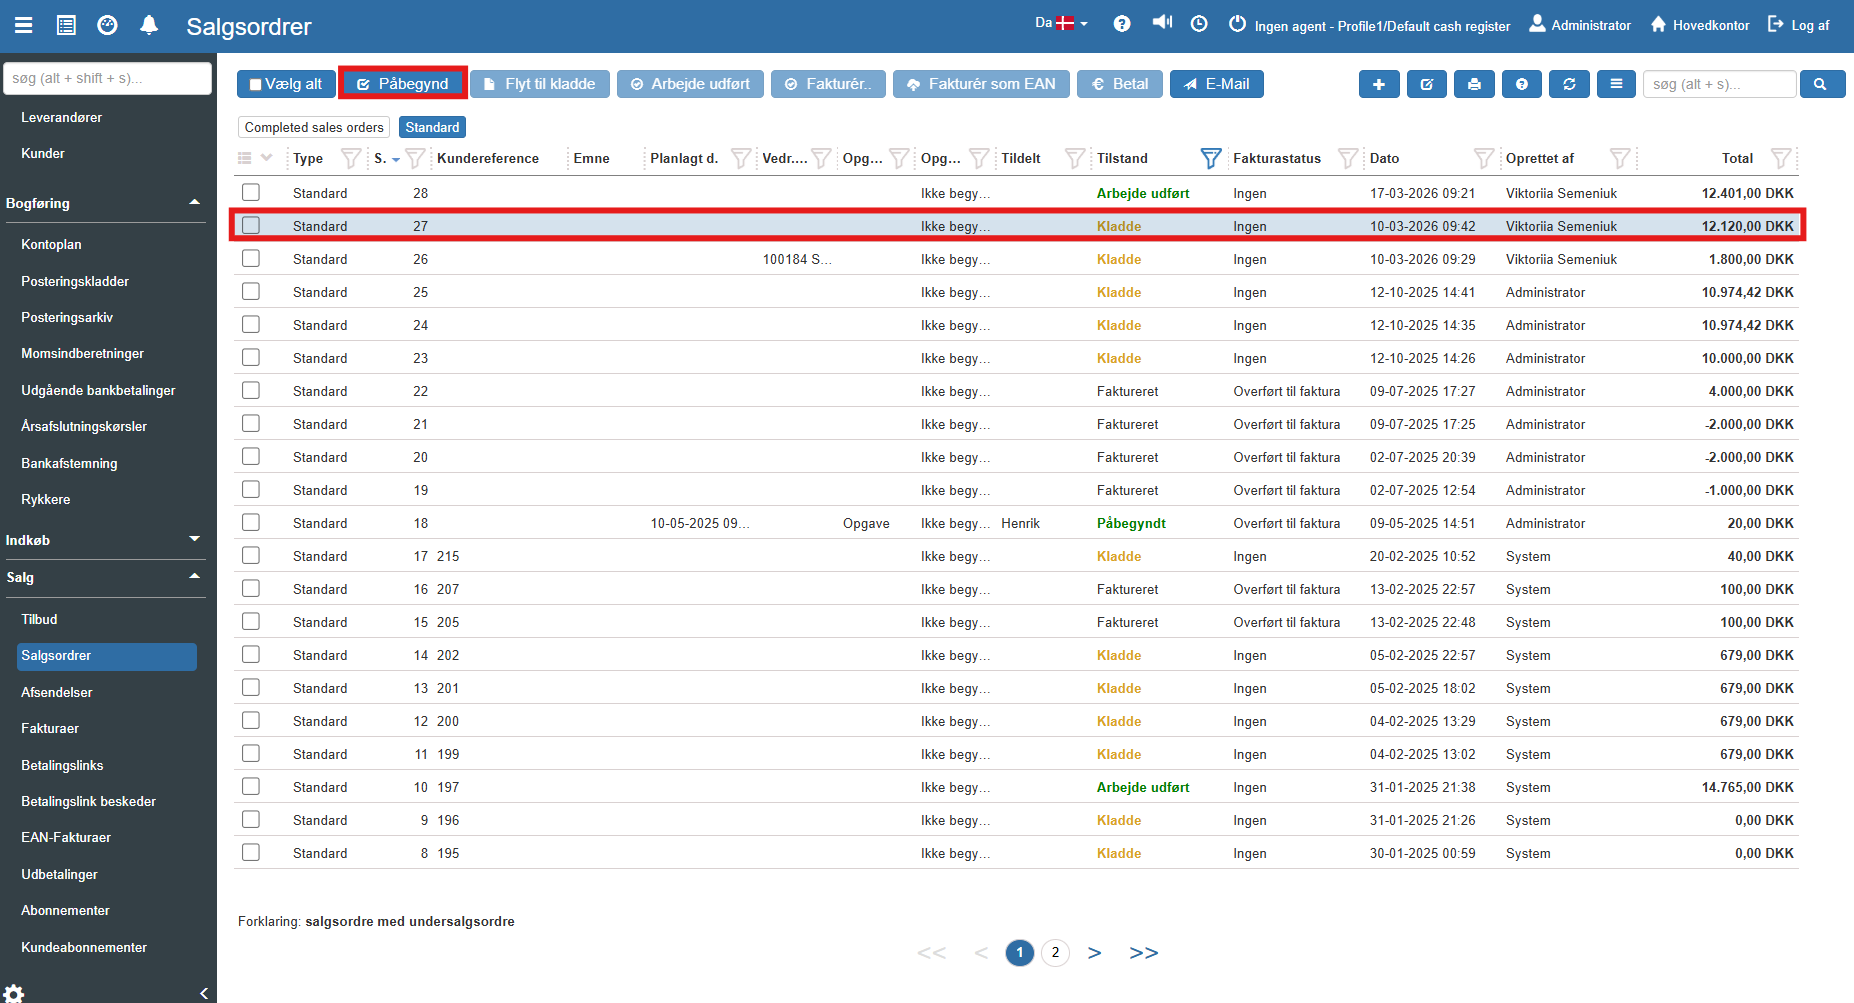
4. The order's state now changes from "Draft" to "Started".
Note: If you clicked by mistake, you can always use the Move to draft button to roll the action back.
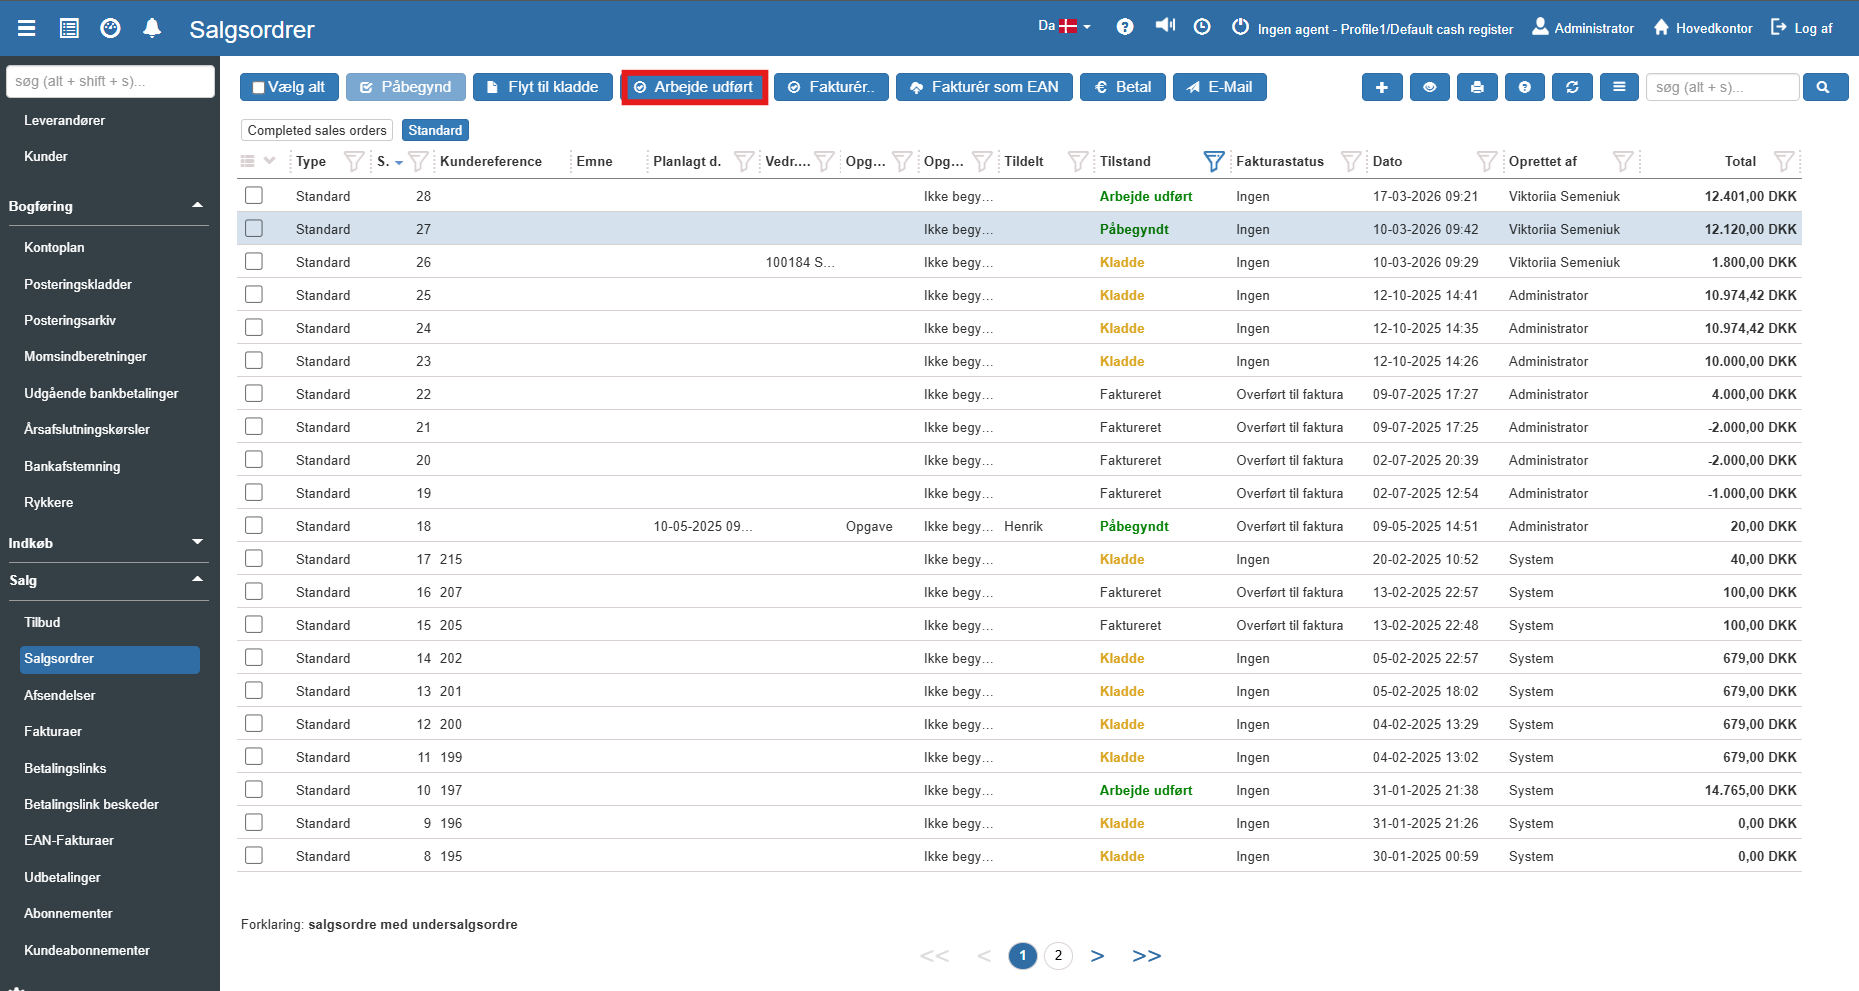
When the goods are packed, or the task is solved, the order must be marked as completed.
1. Select the started order and click the Work done button in the top menu.
2. A new dialog box opens. Here you have the option to write a direct message to the customer with an update on their order:
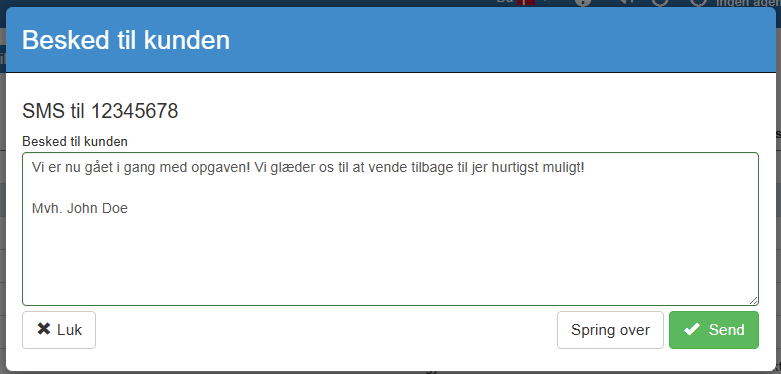
3. Click Send to send the message, or click Skip, if the customer should not receive a notification at this step.
When the work is done, and all applicable details are entered correctly on the order, it is ready to be invoiced.
1. Select the order and click the Invoice... button in the top menu
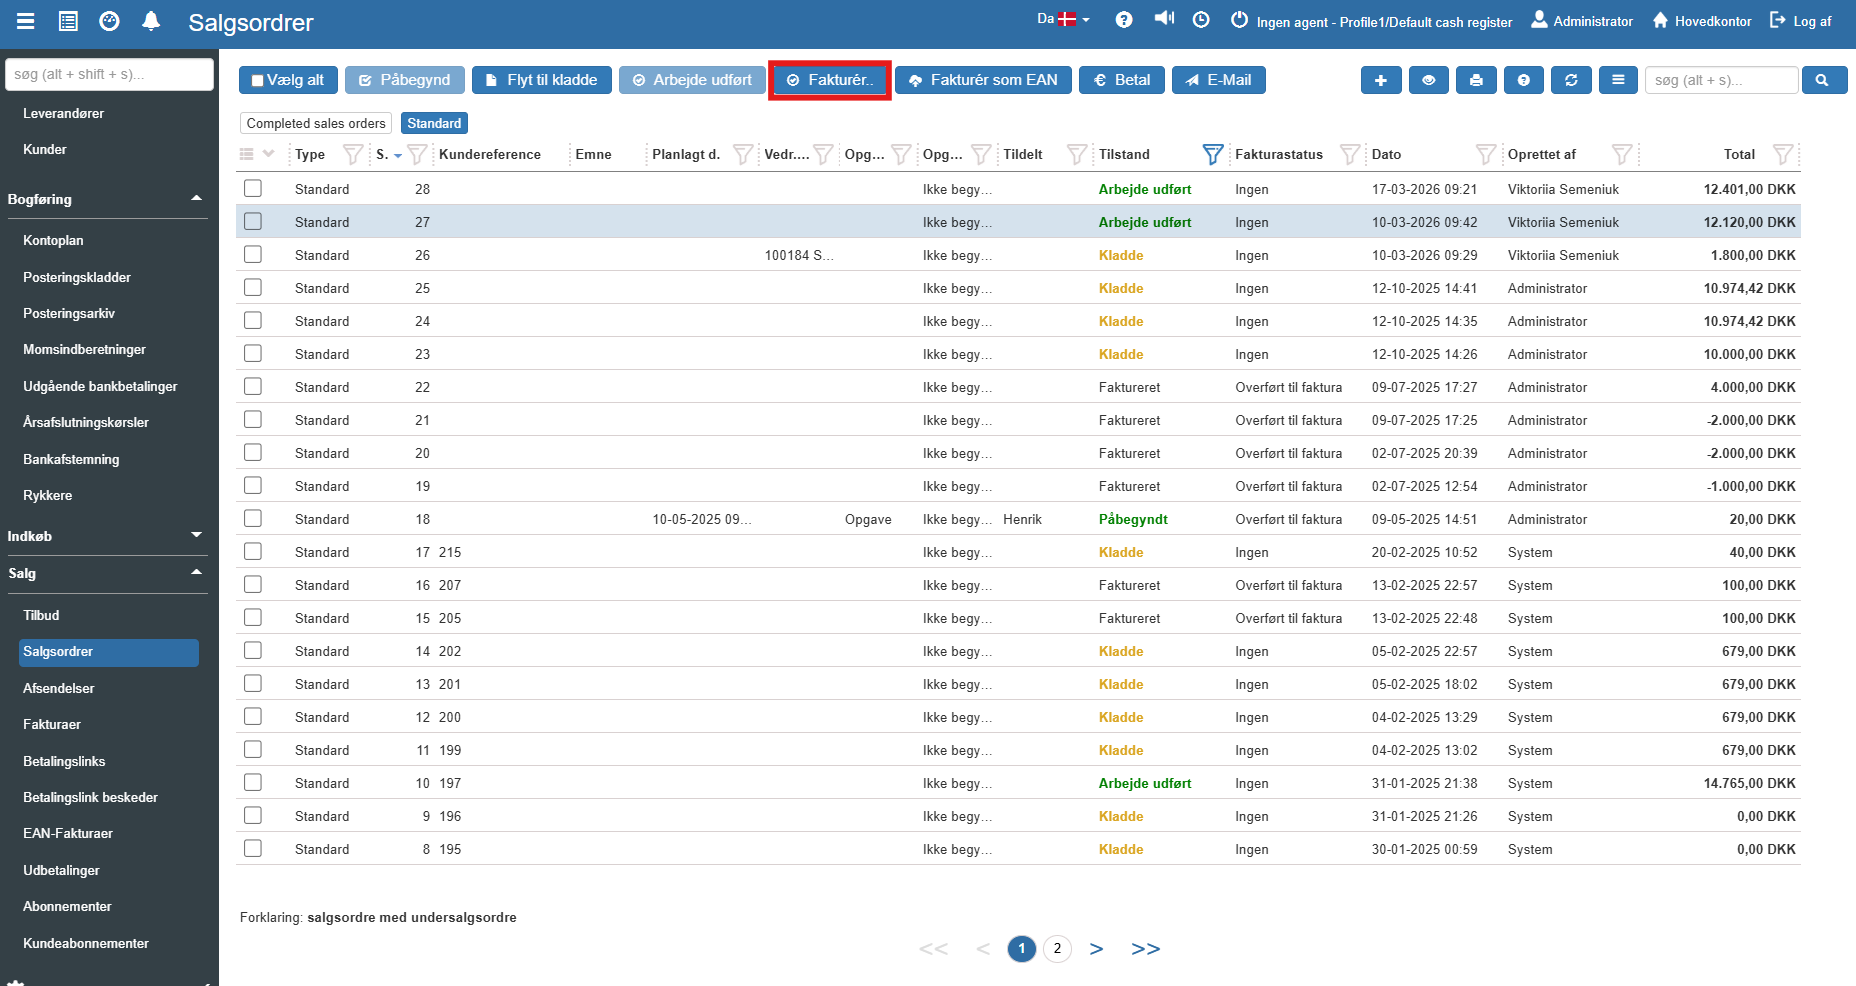
2. You are now presented with two primary options for invoicing:
Invoice: Creates the invoice directly and finalizes it. From here you can export it, download it as a PDF or send it directly to the customer via email.
Create draft and open: Creates the invoice as a draft and opens it on the screen. This is ideal if you need to adjust certain details (e.g. add extra lines or correct prices) before the invoice is posted.
If you select "Create draft and open", you can make your corrections and then click Save and close. The invoice will now be ready in the Invoice module under the state "Draft", where you can continue working on it later.
Creating sales orders
This article explains how to create a sales order.
Invoice
This article explains how to create an invoice printout in Sapera
